I've been doing a little tray-baking! I'd run out of small notelet cards so I whipped up a quartet of them in no time.

My pre-scored notelet cards are 3¾ x 3¾ inches so I started with a piece of white card 7 inches square which, when cut into four gives me 3½ inch square panels ready to stick onto my cards.
I sponged Squeezed Lemonade, Picked Raspberry, Abandoned Coral and Spiced Marmalade onto my white card, starting with the Squeezed Lemonade so that the sponge pad didn't get contaminated with the darker colours, then rubbed the colours in with a tissue. This helps to blend the colours but also soaks up the resin in the ink (particularly important if you're going to stamp and heat-emboss over the inks you've just laid down). A quick blast with the heat gun ensures that the ink is thoroughly dry.
I sprayed and flicked some water onto the card, then dabbed the excess off, and gave it another quick blast of the heat gun to dry.
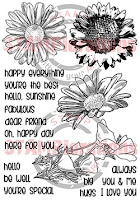
The next step was to cut the card into four squares, then using my MISTI (and it really does live up to its name) I stamped the daisy from Bloom Sketches (any of the large flower images would do) by spritzing it with water, stamping and then blotting the water away to give a bleached effect. If the effect wasn't strong enough, I could easily spritz and re-stamp the image in exactly the same place. Unfortunately I didn't check the photo I took of this stage before moving to the next stage, and it was too blurred to use :(
Using the script stamp from Mixed Media Elements I added some random stamping on the panels, then mounted them onto my cards. They're now ready for a sentiment, or I could leave them just as they are.
Here's a close-up of one of the cards:

Remember, if you try out any of the techniques from our Spotlight posts and add your project to our Spotlight Project Showcase you have a chance to win a $15 gift certificate (random drawing) OR your choice of 5x7 stamp set + a Spotlight Project guest designer spot (randomly drawn from the Top 3 picks).


So pretty!
ReplyDeleteLove these. Hugz
ReplyDeletelove how unique the flowers and inking look with this technique - It's fabulous that no two cards are the same:)
ReplyDeleteOhh what a fabulous project - stunning results with the technique.
ReplyDeleteBlessings
Maxine
Beautiful card! I´ll have to try that technique. Looks like so much fun!
ReplyDeleteBeautiful cards !
ReplyDeleteThese are so gorgeous! Love the colours and the faux bleaching technique, fab! xxx
ReplyDeleteVery pretty colors - so bright & cheerful.
ReplyDeleteGorgeous! Love these colors and that pretty bloom!
ReplyDeleteI love your note cards and their bursts of color. I love the faded flower on each card~
ReplyDeleteI love your note cards and their bursts of color. I love the faded flower on each card~
ReplyDeleteJust love the colours you used Shirley and the cards are stunning! I'm going to whip up afew for some teachers thank you cards too. Thanks for sharing!
ReplyDeleteWHOA - seriously SO COOL!! Love the vibrant and beautiful color on these cards!!
ReplyDeleteGORGEOUS! I so plan to try this!
ReplyDelete~c