Hello and Happy Spring everyone! For my mixed media tutorial this month I thought I would share with you how to create these colorful spring-like tags using only two stencils, one stamp set and the STAMPlorations Nesting Luggage Tag dies.
Today you will be experiencing two lessons in one as I share first how to create these lovely mixed media backgrounds using your stencils and then how to use a stamp and a heat embossing technique to create these lovely works of watercolor art using pigment powders. So let's get started!
I started with two tags cut with the largest Luggage Tag die from pieces of heavy card stock I had sprayed with Dylusions Inks. First I applied some Dreamweaver gold metallic embossing paste through the ARTplorations Circular Two stencil over top the orange tag, then, without cleaning my pallet knife I applied some Dreamweaver black glossy embossing paste through the ARTplorations Square City stencil over top the colorful tag.
Can you see how the gold paste blended with the black paste to create this lovely effect? I added even more gold paste over top of the black paste before I lifted my stencil. And did you notice how the black and gold pastes changed the entire look of the original tag from bright and fun to muted and sophisticated? How cool is that?! Now while these are drying let's go play with the pigment powders!
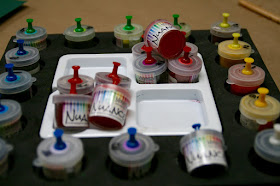
I am using my Nuance pigment powders by Magenta but you can use any of these products, Brushos, Ken Oliver Color Bursts, ColorArte's Primary Elements, whatever you have on hand. I like my Nuance pigment powders because they contain more than one color pigment in each pot and I get a bigger effect in only one step.
For this technique I am using the new STAMPlorations Hope Blooms stamp set and 140lbs watercolor paper. I am stamping it with clear embossing ink, sprinkling it with Stampendous white glossy enamel embossing powder and setting it with my heat gun.
For this next step have the colors you want to use ready... I am using Purple and Aquamarine for the blue set and Golden Yellow and Nutmeg with a hint of Purple for the orange set. First spray your stamped paper with a heavy layer of water, enough so that the water pools in the cells created by the embossing powder...
Now gently sprinkle your first color onto each stamp - start with your lightest color and add it like you are sprinkling on salt - only a little bit at a time, you can add more color later - now count to 20 and watch as the powders activate, mix and swirl... Note: If this does not happen - Spray on more water!
Add your second color and spray your paper again with more water until you get pools of color like this... again count to 20 and then blot off all the excess with a roll of paper towels.
Just roll the entire paper towel roll over top of your paper.... the longer you wait to do this the darker your colors will be... so maybe count to 50! Grin
You can use a paint brush to help direct the color into areas that don't have any and also to blend and mix colors... don't worry about it being too dark or too bright because once you blot off the excess the color becomes a lot lighter...
Notice how I let the complimentary colors of purple and orange touch but did not let them blend... complimentary colors make each other look better, but do not blend well together...
Also, notice how I stamped multiple images of each stamp and each color group had it's own page of multiple images, this is because you cannot really control this process the more images you have the better chance you will end up with one you really like. Once the paper has dried you can cut out your favorite images and assemble them onto the tag base you created earlier...
I left some images whole and cut out pieces from others...
Notice how this lightly colored, blue butterfly totally pops against the complimentary oranges and golds?
So a whole lot of mixed media fun in this month's project! I hope this inspires you to go play with your stencils and if you do ... don't forget to link up to our March Mixed Media Challenge over at STAMPlorations where it's always Anything Goes Except a Card as long as you use a stencil... any brand. The design team always picks a winner and there are prizes to be won!
- $10 gift certificate to the winner voted by the Mixed Media team
- $5 gift certificate each to the 2 top picks
- If there are 25 or more entries: 1 random winner of any 2 standard size stencils
Thanks for popping in today to see what I am up to and please do leave me a comment if you like what you are seeing! (hugs)
Lynne Mizera, Mixed Media Artist
Lynne Mizera, Mixed Media Artist
for the STAMPlorations Mixed Media Design Team
STAMPLORATIONS Products Used on the Project:
 |
| NESTING LUGGAGE TAG DIES |
 |
| SQUARE CITY - STENCIL |
 |
| CIRCULAR TWO - STENCIL |
 |
| HOPE BLOOMS - STAMP |


Everything about this is so inky and fabulous!! I am in <3 <3 <3 with how that gold and black embossing paste look together. Definitely going to give that a go!
ReplyDeleteThanks so much Becca! and I can't wait to see what you create!
DeleteGorgeous tags :) thanks for the tutorial
ReplyDeleteThank you Preeti...
DeleteGreat step by step and hints along the way, thank you x Such fun and colourful tags with lots of techniques, thank you x
ReplyDeleteGlad you like it Dearest...
DeleteBeautiful tags and love the fun pops of colors.
ReplyDeleteThanks so much Ann...
DeleteA lovely technique, thanks for sharing
ReplyDeleteGlad you liked it... and I would love to see what you create with it... Smile!
DeleteWow, Lynn...Stunning Artsy tags and techniques. TFS your tutorial and for all the inspiration. I would love to try some of your techniques...you have my juices flowing :-) Hugs.
ReplyDeletethis is gorgeous!
ReplyDeletelove it!
Lynne honey, these are just gorgeous and have helped with a design idea I was having. Love the gold and black paste together. Off to create. Hugz
ReplyDelete