Hi STAMPlorations friends! I've got a soft spot for trees. And tree stamps. One of the feather stamps in the Feathery set reminded me of a tree swaying in the breeze. Want to see what I've done with it? I've made an aperture card.
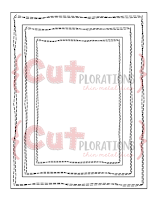
Gathered my supplies - a card base from Neenah CS, Feathery stamp set and dies, Layered Holly stamp set, Crazy Double Stitch Rectangles die and Cracked Pistachio and Evergreen Bough inks.
Laid out the dies like I wanted and made sure to leave space for my sentiment. Die cut the panel.
Used the good old (and less messy) trick of clear embossing Versafine black ink to get a black heat embossed sentiment on the die cut panel.
Then I traced the feather die on the front of my card base as a guide for where to apply the distress inks.
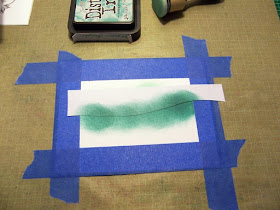
I used painter's tape to 1) hold my card base to my crafter's mat and 2) mask off an inch around the edges so that my inking wouldn't peek out from under the die cut panel. However, this could be a cool look too. Then I put down a "hill mask" I'd hand cut from scrap paper before inking the sky.
I removed the hill mask and put down the "sky mask" (which is just the leftover section of the scrap paper). Added another strip of painter's tape along the bottom and inked the hill. TIP: When working with painter's tape... touch it briefly to your hand or jeans before putting it on your paper to reduce tackiness. And pull back slowly at a 45 degree angle when removing it to prevent tearing your paper.
I positioned the feather-turned-tree stamp on the front of my card base and picked it up with my lined block, noting that the upper right corner of the card is at the intersection of the first lines in the upper right corner of the block so when I go to stamp I get the tree exactly where I'd wanted it. In the second photo you can see how I then straightened the stamp to create more of a tree/trunk look before inking and stamping.
Then I looked at my work and briefly considered ditching the aperture card idea cuz I thought this looked kinda cool...
...but I continued on to the splattering of watered down acrylic paint as snow. Put some scrap paper around the area to prevent splatters outside the aperture area. TIP: Test your splatters before splattering your project. I did on that larger scrap on the left. See the dots?
Then I cleaned up the area and waited for the splatters to dry.
Last step was to adhere the panel over the inked area with dimensional adhesive. Voila! BTW, thanks to Birgit for the inspiration!
Should you try out any of our Spotlight techniques, like an aperture card, be sure to hook up your project at our Spotlight Project Showcase.


Yes it looks contemporary and cool both ways...with or without the aperture. Such a fabulous card x
ReplyDeleteBrilliant!
ReplyDeleteElaine
Gorgeous projects !
ReplyDeleteFabulous card, love the technique
ReplyDeleteVery cool technique and result. Hugz
ReplyDeleteits so great!
ReplyDeleteHappy Holidays 🎄🎅⛄
hugs , Fiki