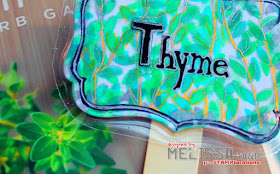
Hi! Are you headed towards Spring in your part of the world? Or would you like to grow some fresh herbs indoors? I may have a project that will interest you. I've made some herb garden markers to share with you.
I hope that you enjoy seeing the process I used to create these cute little garden markers and are inspired to do a little crafting of your own.
I used the following STAMPlorations products for this tutorial:
ARTplorations Stencils: Leaves 1 - Sanna Lippert Designs, Bloom Silhouettes,
STAMPlorations: Trendy Leaves 2
CUTplorations: Curly Labels/Tags Nesting Dies
1. For the "Thyme marker" I started by die cutting the tag out of heavy white card stock and stenciling a variety of greens and silver ink leaves onto the tag. I also cut out an uppercase "T."
2. I then embellished the herb tag/marker with black permanent marker, gel pens (silver, gold and white) and silver Smooch Spritz.
3. I adhered the "T" and then laminated the tag(s), fussy cut the tag and taped on a rigid push in marker plant stick.
4. I followed the same basic procedure to make the markers for my Parsley, Sage and Rosemary.
Already for my herb pots or garden!
That's all I have for you for today. I hope that you enjoyed this tutorial and look forward to reading your comments.
I hope that you have a great day.
Thanks for stopping by!
Grace & Peace,

ARTplorations/CUTplorations/STAMPlorations products:


Love this idea!
ReplyDeleteSuch a creative and fun idea and fabulous backgrounds x
ReplyDeleteBeautiful herbs labels for your herb garden, Melissa. Would be wonderful for a plant gift too. TFS your gorgeous project and all the steps. So appreciated. Hugs
ReplyDeleteThese are so fun, Melissa! They would be a great gift for family/friend herb gardeners!! Thanks!
ReplyDeleteits so nice!
ReplyDelete