Happy Monday, STAMPlorations friends! If you've been to the store lately, you may have noticed a bunch of new products have been added. In fact, we have a new section: Colorables, Ephemera, and Card Fronts. I'll be adding more products over the next several weeks, including kits and bundles. But today, I'd like to put the spotlight on our Colorables line, specifically these two products: Color Me Blooms Spring Florals A2 Colorable Card Fronts and Color Me Blooms Spring Florals Laser Cuts.
Hi there, it's Tanja and did you know that STAMPlorations has a new product line called Colorables? I would like to show you some projects using the Color Me Blooms Spring Florals and the Color me Blooms A2 Card Fronts that I created together with my daughter Emily (11).
- color one of the Color Me Blooms Spring Florals with Spectrum Noir Triblend Markers and add extra shading with Faber-Castell Polychromos pencils
- adhere the florals to a white panel and add black and white splatters
- the sentiment is from the Skinny Sentiments dies set cut from vellum and black cardstock
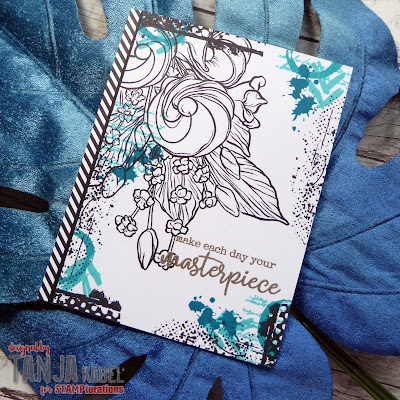
- stamp the sentiment from the Softly stamp set with Versamark onto one of the Color me Blooms A2 Card Fronts and heat-emboss it with Ranger Liquid Platinum embossing powder
- add some stamping using the Mixed Media Grunge, Mixed Media Elements, and the Art Marks stamp sets and Altenew Crisp Ink (Aqualicious, Teal Cave, Galactic Stream) and Versafine Clair Nocturne
- add a strip of black cardstock and a strip of patterned paper to the left side of the panel before adhering it to a card base
- stamp the sentiment from the Softly stamp set with Versamark onto one of the Color me Blooms A2 Card Fronts and heat-emboss it with WOW! Metallic Gold Rich Super Fine embossing powderF
- add some stamping using the Mixed Media Grunge and Mixed Media Elements sets and Altenew Crisp Ink (Wisteria, Hydrangea, Andromeda) and Versafine Clair Nocturne
- add a strip of black cardstock and a strip of patterned paper to the left side of the panel before adhering it to a card base
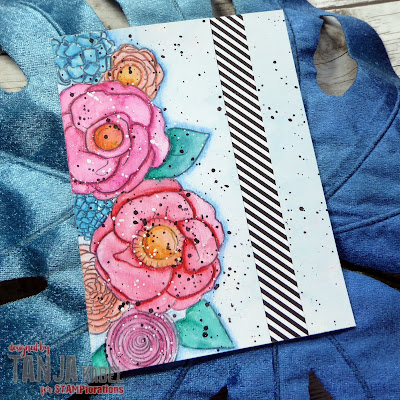
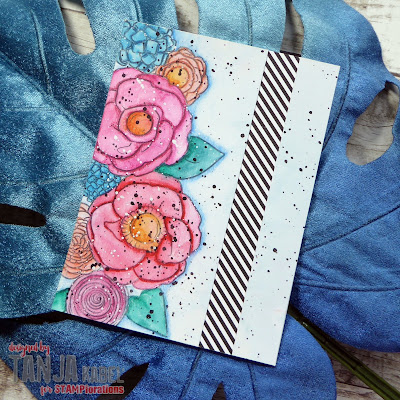
- cover one of the Color me Blooms A2 Card Fronts with two layers of Schmincke Watercolor Ground and let it dry thoroughly
- color the image with Derwent Inktense Pencils and a damp watercolor brush
- add black and white splatters
- add a strip of patterned paper into the middle of the panel before adhering it to a card base
- cover one of the Color Me Blooms Spring Florals with two layers of Schmincke Watercolor Ground and let it dry thoroughly
- color the image with Derwent Inktense Pencils and a damp watercolor brush
- create a background on a panel of smooth white cardstock using the Shutters Mini stencil, Distress Oxide Ink Dusty Concord and a Blending Brush
- cut the Smile word die sentiment from black cardstock
- add strips of lilac cardstock and patterned paper to the left and right side of the panel before adhering it to a card base
- color one of the Color Me Blooms Spring Florals with Spectrum Noir Triblend Markers and add extra shading with Faber-Castell Polychromos pencils
- adhere the florals to a white panel and add black and white splatters
- the sentiment is from the Skinny Sentiments dies set cut from vellum and lilac cardstock
- adhere the panel to a lilac card base
- ink up the edges with Distress Oxide Ink Dusty Concord and a Blending Brush
I hope you got inspired.


I have never left flowers uncolored, but they look cool yet elegant. Nice...
ReplyDeleteAmazing cards today, I love the variety
ReplyDeleteSuch gorgeous flowers! I love the colors!
ReplyDeleteLove all the cards! I'm gonna go play. :D
ReplyDeleteThese are so cool! The cards are just amazing!
ReplyDeleteFantastic cards..need to try not colouring my flowers.
ReplyDeleteBeautiful cards!
ReplyDeleteThese will be soooo much fun - great inspiration!!! Thanks.
ReplyDeleteSimply gorgeous - colored or uncolored.
ReplyDeleteI love the bold striped strips of paper... or washi tape? They provide a beautiful contrast to the uncolored flowers. Just beautiful!
ReplyDeleteWow! Gorgeous cards! Love these!
ReplyDeleteAwesome designs! Love these beautiful cards!
ReplyDeleteI like your pretty examples.
ReplyDeleteso creative!
ReplyDeleteWould like to use these, but have always found it hard to make colorable panels into cards. Great ideas on how to use.
ReplyDeleteLOVE how you have used these gorgeous images - very creative
ReplyDelete