


SHIPPING BREAK COUNTDOWN
Order by 5 PM Pacific Time today to have your order shipped before our break!
00 DAYS 00 HRS 00 MIN 00 SEC
Showing posts with label clear stickers. Show all posts

Thursday, July 23, 2026

creative tip of the day | four birthday cards in 20 minutes

Have 20 minutes? Make four birthday cards. While my machines were busy cutting stencils for a customer order, I decided to put those 20 minutes to good use instead of waiting around.

I grabbed four Wish Big A2 Card Fronts and four Birthday Word Art Clear Stickers and challenged myself to create four finished birthday cards before my machines were done. Twenty minutes later, I had four completed cards -- each paired with an envelope, ready for me to write in and send to their recipients.

The best part? No stamping, coloring, or die cutting required.

How to Get the Look

For these cards, I used:

Here's exactly what I did:

  1. Applied each clear sticker to white cardstock.
  2. Trimmed the panels to size.
  3. Rounded the corners.
  4. Matted two of the panels onto coordinating cardstock for added contrast and adhered them onto the card fronts.
  5. Inked the edges of each card front with a coordinating ink.
  6. Adhered everything to an A2 card base.
  7. Stamped the back with my handmade stamp, added matching envelopes, and packaged each card in a cello bag.

Why We (I) Love It

  • You can create several finished cards in a surprisingly short amount of time.
  • Card fronts and clear stickers coordinate beautifully, so the design work is already done for you.
  • Small finishing touches like inked edges and rounded corners give the cards a polished look.
  • It's a great way to use those little pockets of creative time while another project is running.
  • These quick cards are perfect for gifts, your personal card stash, or even selling at craft fairs and maker's markets.

Creative Takeaway

Sometimes we convince ourselves we don't have enough time to create because we're thinking in hours instead of minutes. I'm very much guilty of this! These four cards reminded me that creativity doesn't always have to be complicated. Twenty focused minutes was enough to turn supplies I already had into four finished handmade cards that are ready to brighten someone's birthday.

Looking for Fresh Supplies Every Month?

If you enjoy making quick cards like these, our subscriptions make it easy to keep your creative stash stocked with coordinating products.

Card Fronts VIP Subscription - Choose one Card Fronts pack every month and enjoy free worldwide shipping. It's a great way to build a collection of ready-to-use backgrounds for quick cards like these.

Clear Stickers VIP Subscription - Choose any three Clear Stickers packs every month with free worldwide shipping. They're perfect for adding focal images, sentiments, and finishing touches without stamping.

Paper Goods VIP Subscription - Want even more variety? The Paper Goods VIP Subscription lets you choose any four paper goods products each month with free US shipping. Mix and match card fronts, ATCs, collage paper, ephemera, and more to keep your projects fresh all year long. (Currently available to U.S. customers only.)

Create More in Less Time

Whether you have twenty minutes or two hours, every creative session counts. Sometimes all it takes is combining a beautiful background with a coordinating focal image to create a handmade card you'll be proud to send—or sell.

Create boldly. Create creatively. Create with STAMPlorations.


Thursday, July 16, 2026

Creative Inspiration | Layering with Purpose with Vicki

One of the things I enjoy most about cardmaking is discovering how different products can work together to create something that feels completely cohesive. A beautiful background, a meaningful sentiment, and a well-chosen focal image each play a different role, and when they're thoughtfully combined, the result often looks far more intricate than it actually is.

Today, STAMPgirl Vicki is sharing a lovely card that beautifully illustrates this idea. She paired our Botanical Backgrounds Clear Stickers with the bold typography from our Coffee Feel Good Clear Stickers, then added hand-colored images from our Doodled Coffee & Tea Colorables to complete the design.

I especially like how the soft floral background provides just enough texture without competing with the sentiment or focal images. The coffee mug and French press become the stars of the card, while the bold sentiment ties everything together and gives the design its personality. Each element has its own purpose, yet they work together so naturally that the finished card feels balanced and inviting.

Creative Takeaway

One of the easiest ways to create a polished card is to think in layers rather than techniques. Start with a background that quietly supports your design, add a sentiment that immediately catches the eye, then finish with a focal image that tells the story. Each layer contributes something different, creating depth and interest without making the design feel busy.

Discover What's Possible

Our Clear Stickers are designed to make layering simple and fun. Whether you're combining backgrounds, sentiments, or decorative elements, they work beautifully together while giving you plenty of creative flexibility. Pair them with our Colorables, Paper Goods, stamps, or your favorite coloring medium to create projects that are uniquely your own.

Today's card is a wonderful reminder that beautiful designs don't have to be complicated—sometimes it's simply a matter of choosing elements that work well together.

Happy creating!


Wednesday, April 22, 2026

Creative Tip of the Day: Two Ways to Layer Clear Stickers

Today's creative tip features a card by Helen Gullett. She demonstrates how versatile clear stickers can be. Whether you want a seamless, flat border or a popped-up focal point, clear stickers are the ultimate multi-tasking tool for your stash. 🌸✨

🌟 Two Ways to Layer Clear Stickers 🎨✨

Clear stickers are a staple for a reason -- they offer a crisp, professional look with zero bulk. In her latest card, Helen shows us how to use them for both background texture and as a dimensional focal point on the very same project.


Thursday, October 24, 2019

{STAMPlorations Belated 6th Birthday} Day 4 - Clear Stickers


Hello STAMPy stampers! Welcome to day four of our 6th Birthday Celebration. Thanks for coming back to see us every day, we are so happy to celebrate with you and to see your creations and hear your comments and thoughts. What has been your favourite new product so far? It's a tough one, isn't it? Just when you thought things couldn't get any better we are here today to show you some new and super exciting products. Some of our creative designers have already shown you sneak peeks of the new super fun Clear Stickers over the last few months but now we are here in force to really showcase this fun new addition to the STAMPlorations product family.

There are many ways for you to join in with the fun - you can link up your STAMPlorations Store Wish List in our Wishlist Linky Party, you can link up your celebration-themed projects in our Birthday Linky Party and last but not least you can win prizes by commenting on our Birthday Celebration blog posts and the designers' blogs. And it wouldn't be a Birthday Celebration without lots of prizes, we have plenty of prizes including a whopping $50 gift code for the STAMPlorations Store! You can find more details at the end of the post.


 Jane


with Yuletide Deer and Joy


Did you get inspired by stickers? If you want more, you can find some of our previous Clear Sticker posts here! Did we manage to convince you they are super versatile and great for many different crafty projects? If you can't wait to get your hands on these beauties, they are 25% off in the STAMPlorations store in October using the code CLEAR25 (note this code does not apply to new products). Stickers are a fun and affordable way to extend your crafty stash and great for trying a new style or look before committing money on stamps and dies.

We would love to see you play along with our Birthday Linky Party. You can link up a maximum of three celebration themed projects. For full rules, see the Birthday Linky Party post. You can also play along with our Wishlist Linky Party. Both linky parties are open until November 5th.

And of course, we have a lot of wonderful prizes!
  • ONE (1) winner of $40 worth of products in their wishlist (from the Wishlist Linky Party)
  • THREE (3) winners of a $10 gift certificate - randomly drawn from comments left on the birthday hop posts and designers' blog posts
  • THREE (3) winners of a $15 gift code - randomly drawn from entries in the birthday linky party
  • ONE (1) winner of a $50 gift code - randomly drawn from entries in the birthday linky party
  • A few surprise winners of products and/or gift certificates

Monday, October 14, 2019

{Sticker Monday} Terri Gets Creative with Clear Stickers


Hey, STAMPlorations friends! We're introducing a brand new feature here on the blog: Sticker Monday. Every 2nd and 4th Monday of the month, the STAMPgirls will be sharing projects showcasing our line of fun clear stickers. And every month, we'll draw one lucky crafter to win a $15 gift code -- randomly drawn from all comments left on the Sticker Monday posts for the month, as well as from the featured designer's blog.

Kicking off Sticker Monday is STAMPgirl Terri. For the next 3 months, you'll see her share creative ways to use clear stickers in various papercrafting projects.


Wednesday, August 21, 2019

{Special Post} Karola Creates a Card Kit with Clear Stickers


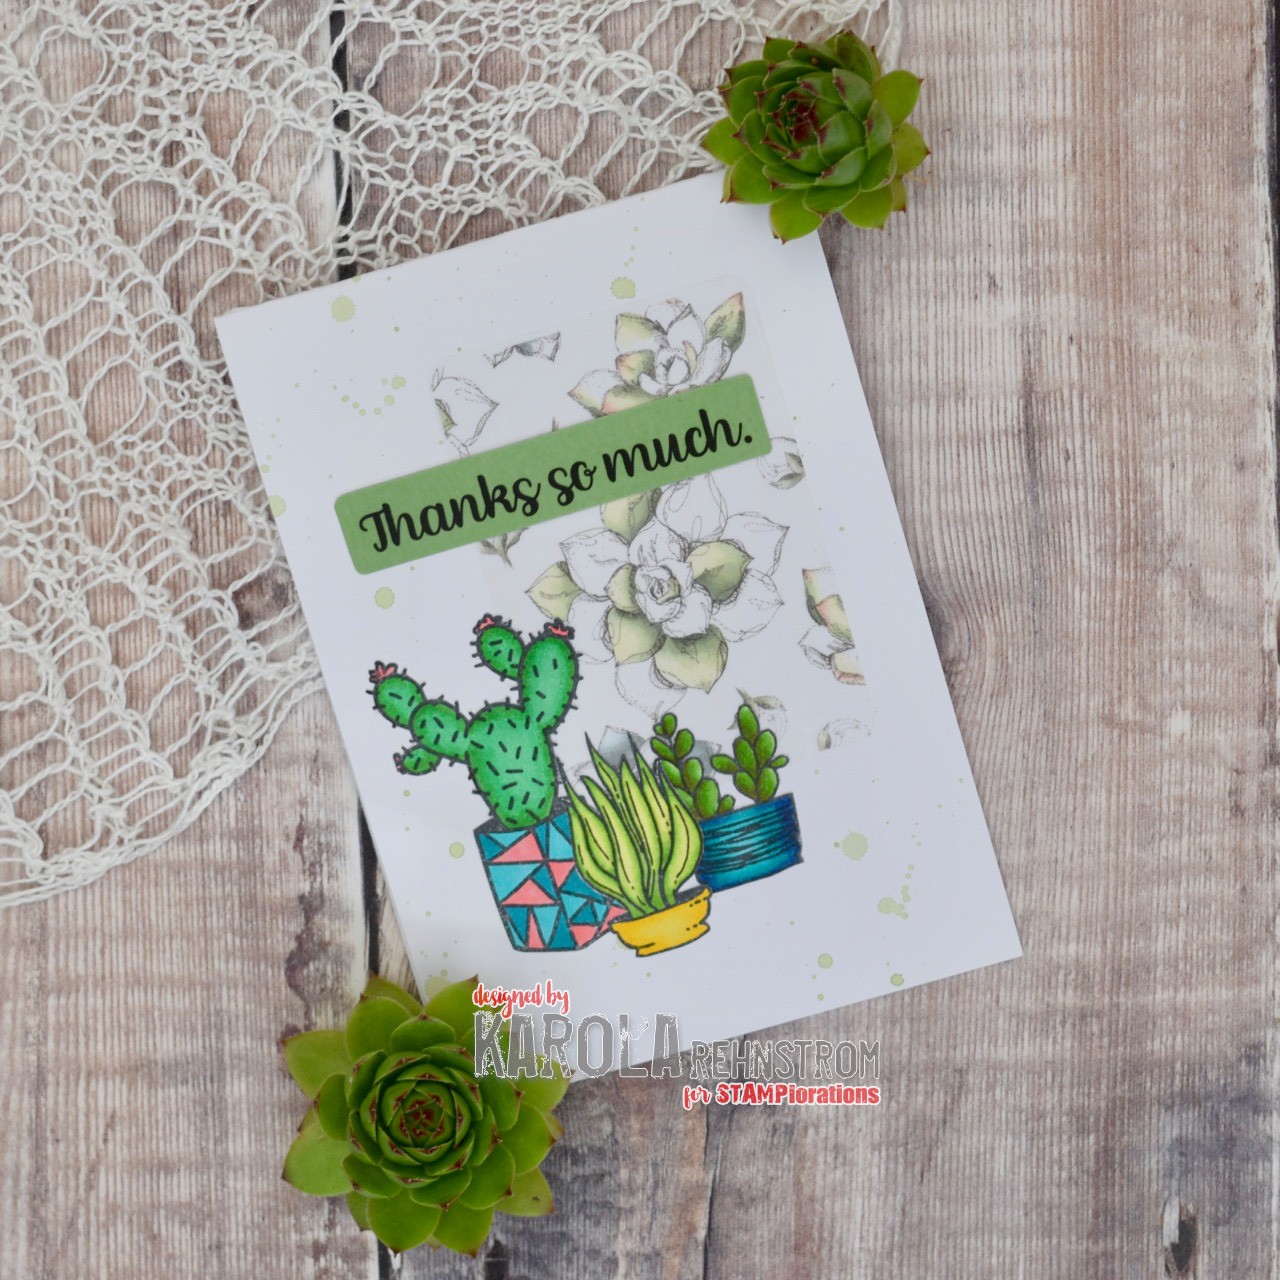
Hi crafty peeps! Karola here today to share a fun way to use the new STAMPlorations Clear Stickers to create a customisable card kit. Each card comes with a strip for the sentiment, as well as sentiments from the Just Everyday Greetings Clear Stickers (during August you get 30% off the Clear Stickers!). The strips for the sentiments have not been adhered to the cards. Therefore, it's easy for the recipient of the kit to adhere the most suitable sentiment for their needs, trim off the excess sticker and adhere the strip to the card using the double-sided tape I added to the back of the strips. Alternatively, the stickers can be attached directly to the cards. How fun is that?!?

Thursday, May 30, 2019

{Special Post} Clear Stickers in Fun and Artsy Mixed Media Projects! + Giveaway


Hello, hello! Here's our last fun post featuring our brand new product: clear stickers. If you missed our first post, you'll find it here. The other posts are here, here, and here. STAMPgirl Sanna created 6 fabulous mixed media projects to show off our stickers. Have a look :o)


Monday, May 27, 2019

{Special Post} Create Clean and Simple Cards with Clear Stickers! + Giveaway


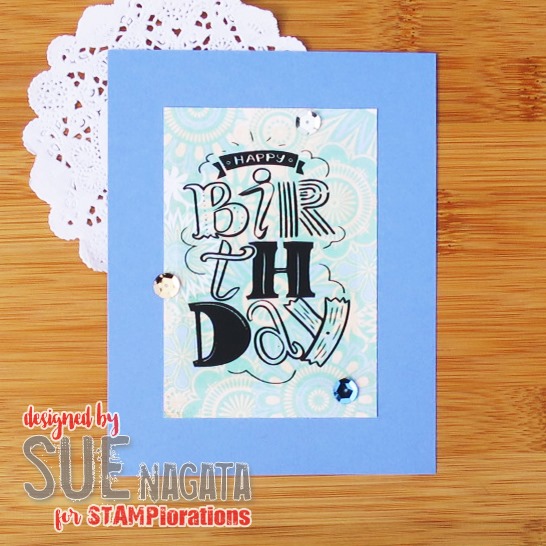
Happy Monday, STAMPlorations friends! To those of you in the US, happy Memorial Day! Today we have another post featuring our brand new product: clear stickers. If you missed our first post, you'll find it here. The other post is here and last Friday's post is here. STAMPgirl Sue creates beautiful CAS cards and her projects today show just how CAS cardmaking can be made even easier with clear stickers! Take a look :o)