SEARCH THIS BLOG

Showing posts with label spotlight project. Show all posts

Wednesday, March 16, 2022

{Spotlight Project} Monika Tries Spotlight Stencilling


Hi STAMPlorations Friends! Having been musing what to do for this month's post, I wondered how it might be possible to adapt the spotlight colouring technique for stamped images to stencilled images and patterns. Have a look at what I came up with.


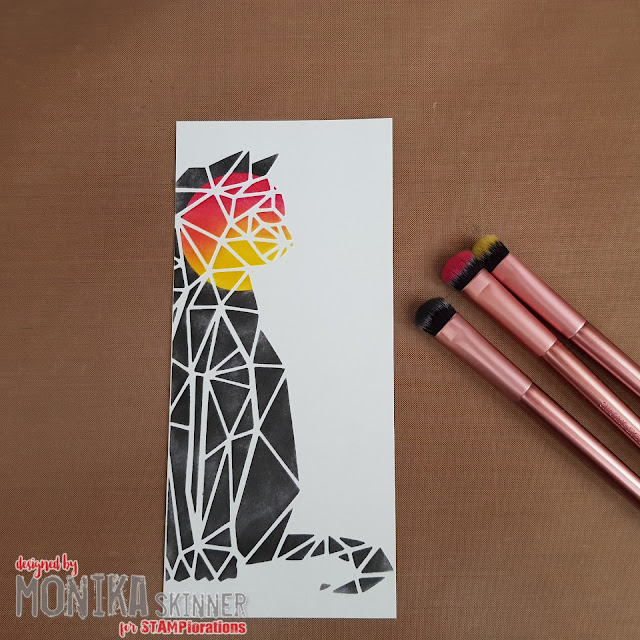
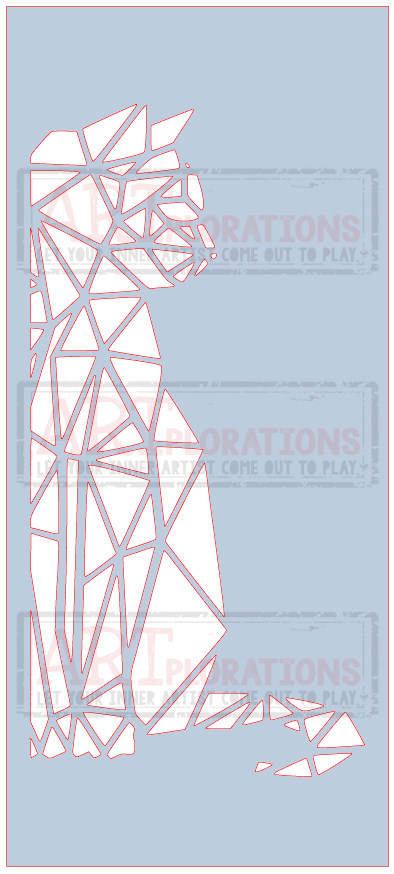
The Kitty slimline stencil seemed to be a good one to colour in grey and try to spotlight the face with brighter colours. That was the plan.

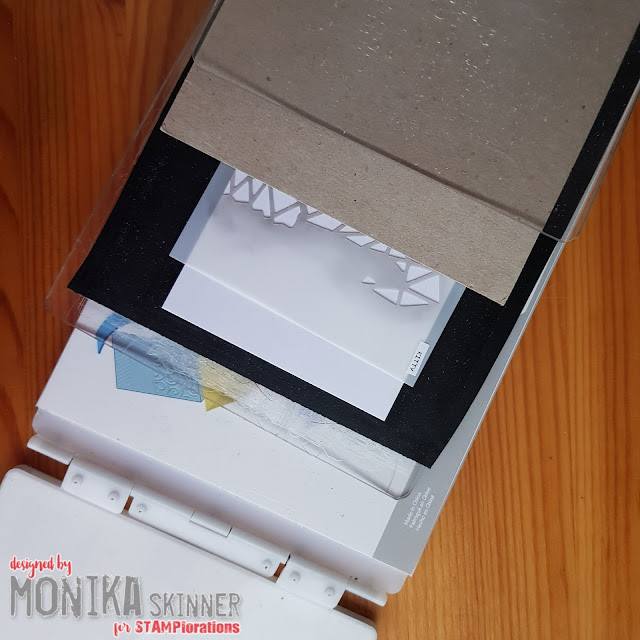
Before starting applying colour, I decided to dry emboss kitty first. Below is the sandwich I used for my big shot: platform without shims - clear cutting plate - black rubber mat - piece of card to emboss - Kitty stencil - a piece of plain card to avoid my worn plate imprinting on my embossed stencil image - clear cutting plate


Leaving the stencil aligned with my embossed kitty, I picked the smallest ring from the Circles Flexi-Template, attached it in place with repositionable double sided tape and applied Daffodil Delight and Melon Mambo inks within the circle only.


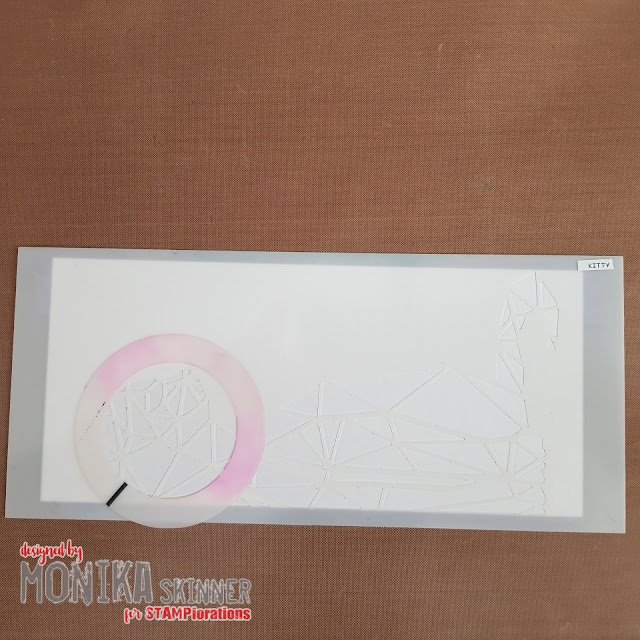
I used the circle from the template as mask and started applying grey ink. I had to go with the darker Basic Gray, the Smoky Slate was simply too light. Originally I had planned to use a mix of both.


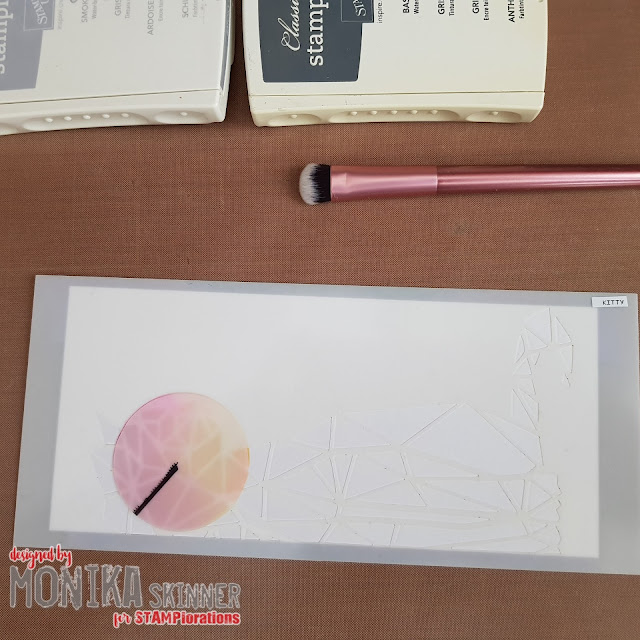
This is how it turned out after the stencil and template mask were removed. The small brushes are the makeup brushes I used for applying the colour.


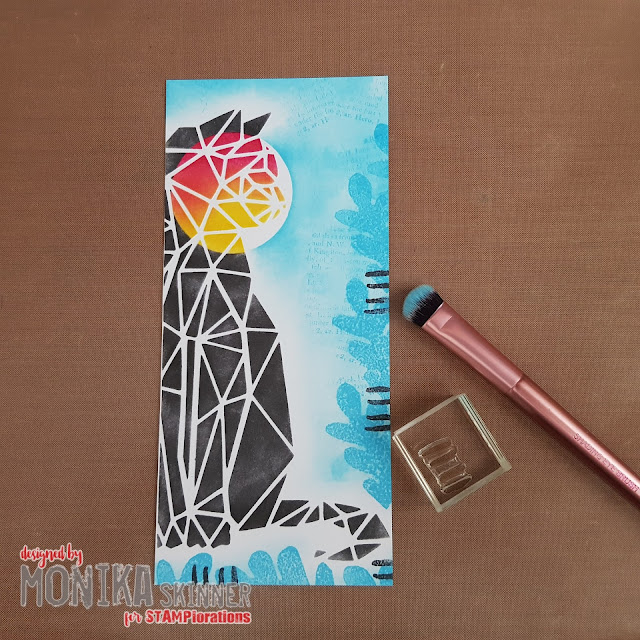
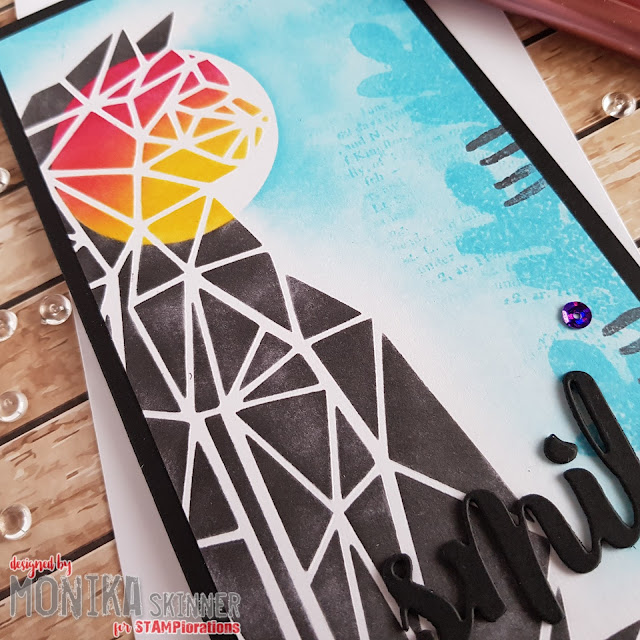
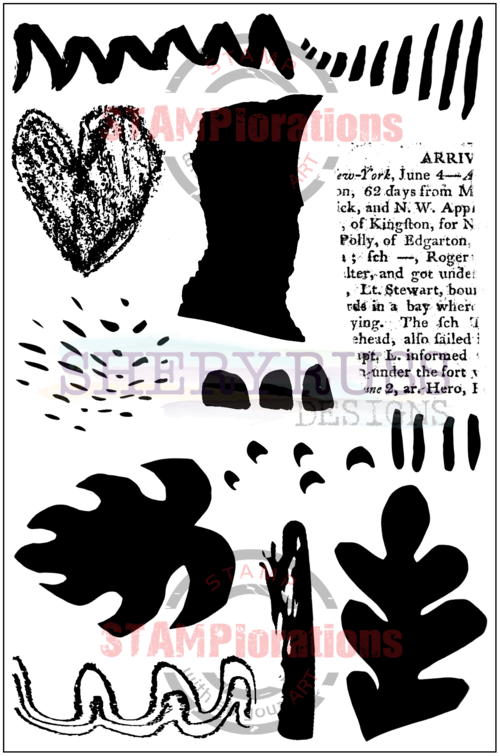
I could have used kitty just like that and maybe added a few splatters, but I wanted to see how it would turn out with the circle completed. The circle mask went back on and I blended a bit of Tempting Turquoise for added colour. A bit of stamping was added around the edge using stamps from the Art Marks 3 set before finishing off with a die-cut sentiment and a couple of sequins.


I rather liked how my experiment turned out. It will certainly be a technique to add to my toolbox.


***************

These are the products I used from the STAMPlorations Shop to make my card.


That's it from me for today. Wishing you a lovely week.
hugs
Monika ❤

Thursday, March 10, 2022

{Spotlight Project} Maria Revisits Scrap Strips


I'm back again this month still talking about scrap strips. This time I took some scrap paper I'd used when swiping ink pads directly onto my ink swatches. In the past I'd always stamped a solid image onto my swatches but I've decided I like the color swiped onto the swatch so I've been updating them. I have a lot of inks. A lot. All that yummy color? I just had to make something with the prettiness.


STEP 1

Gather supplies - I grabbed the swatching scrap papers with all their prettiness, a piece of scrap paper to glue them onto, a glue stick and a tag die. I also wanted to add some texture paste through a stencil onto the cardbase. The rest I figured out as I went along...


STEP 2

Tore some strips in ROYGBIV order and glued them onto my scrap paper. Notice I'd traced the die onto the scrap to give me a good idea of where to place the strips.


STEP 3

When the glue was dry I die cut the tag. TIP: Rather than throwing all of the negative piece away, I trimmed off a strip of it to adorn the inside of my card ;)
I also die cut three tags from scrap cardstock to stack before adhering the tag to my card front.


STEP 4

I snazzed up my card front with some shimmery paste through this fun stencil. I did not cover the entire front, just three random areas. TIP: Be careful not to place your stencil in the wet paste when you move it around.


Here's the finished card again. I gussied it up with a couple feather leftovers from my scrap drawer. Rainbows. Aren't they the best?


Tearing up scraps or backgrounds you've made is another great way to put them to use in your cardmaking. As always, if I inspire you to place an order in the shop, I'd love it if you used my STAMPGIRLMARIA code for an additional 20% off at no extra cost to you.


Thursday, February 10, 2022

{Spotlight Project} Maria Has Die-cutting Fun With Scrap Strips


Well friends, I have a luxury problem. I get to move my crafting from my basement laundry room to DD's old bedroom. Woohoo! Daylight! But let me tell you, I am totally overwhelmed. How to make it perfect? And boy do I need to purge.

So when I find myself unable to deal with the ginormity (is that a word?) of it all, I submerge myself in little projects. One of which was tackling my bucket of scrap strips. You know the ones you cut off the bottom of a card or a background you made or a piece of PP. I had a blast just adhering those strips to a piece of scrap paper then decided to do some fun die cutting with them. Speaking of fun, have you ever listened to Carissa W. podcast? She's full of cardmaking tips and reminds us to have fun in the craft room too ;) Let's get to my card, shall we?


Thursday, February 03, 2022

{Spotlight Project} Watercolour Vellum Flowers With Monika


Hi STAMPlorations Friends! Embossed and watercoloured vellum makes for very delicate flowers you can use in your projects. Here are a couple of cards I made.


Thursday, January 13, 2022

{Spotlight Project} Maria Gets A Start On Christmas Cards (By Recycling Christmas Cards!)


Happy New Year, STAMP friends!

Here we go with another 365 day trip around the sun. Sure hope this year might bring a little more hope for all of us. Speaking of which, I "hope" you're not sick of Christmas just yet. Putting decorations away I just can't bring myself to trash beautiful received Christmas cards, can you? Today I'm sharing an idea for recycling them and letting their beautiful artwork shine on a handmade Christmas card that you can send next Christmas. Interested? I've made a few. Here's one.


Thursday, January 06, 2022

{Spotlight Project} Heart Balloon to Butterfly with Monika


Hi STAMPlorations Friends! Welcome to my first Spotlight project of 2022. When I recently rearranged my craft space I found some die-cut balloons with their negative cuts which I had kept for future use.

Today's project tutorial makes good use of the inner negative cut from the balloon frame. Have a look.


Well, I turned them into a butterfly. Here is how my project came together.

Thursday, December 09, 2021

{Spotlight Project} Maria Uses Ephemera To Mass Produce CAS Christmas cards


Hello STAMP friends! Hope you're not sick of me and my ephemera yet. It's just such fun to let the cute pieces do the heavy lifting while you just add a little here and there. Ready for some super CAS versions? First I must apologize, the card pictured is not the card made in the tutorial. I ran out of good natural light for photos. But the concept is totally the same. Please come by my blog  for the rest of the lineup - I had 8 pieces of ephemera to use up ;) So this tutorial covers the production line approach to making these clean and simple cards. Shall we get to it?


Thursday, December 02, 2021

{Spotlight Project} Monika Revisits The 'Impossible Card'


Hi STAMPlorations Friends! Today I'm revisiting the 'Impossible Card' for a little Christmas scene which can either be used as a card to send, given that it folds flat, or be used as a piece of hand made Christmas decoration. Here it is ...


Thursday, November 25, 2021

{Spotlight Project} Maria Uses Ephemera ATCs For Quick And Easy Christmas Cards


Hello STAMP friends! Do you make your own Christmas cards to send? If so maybe you're already done making them, but if not I've got a super easy way to create a Christmas card with a fun factor. And to do some recycling ;) Let's get to it.


Thursday, November 11, 2021

{Spotlight Project} Monika Plays With Quick Cards #2


Hi STAMPlorations Friends! Today I'm putting the spotlight on the Quick Card Fronts #2 for some quick Christmas cards. They are perfect for last minute makes. Have a look:


I picked two from the eight designs which are in the pack. The florals are quite intricate and I didn't want to cover them up hence I decided to use the Christmas Angel die whose silhouette shape was perfect. The Nativity die would have worked well too.

Let me walk you through the basic steps.


First I die-cut the angel into my card fronts and removed the die-cut shape At this point it is important to keep the bits from the halo and from where the hands meet the trumpet.

TIP!: If your plates are as worn as mine, it is best to place a piece of paper over the card front and the die before putting the top plate on to prevent the card front being imprinted/embossed with the worn plate pattern.


I selected some matching card for my base cards and to die-cut more angels for layering. Next I attached the card fronts, without the angel shape, to my base cards before adding one of the angels cut for layering into the card front.

I then added the two bits from the halo and the hands/trumpet which I kept earlier. I finished off with layering the other angels with the one cut from the card front on top. This gave the embossed look with a darker shadow for contrast.

My cards were finished off with a double layered matching die-cut sentiment.


***************

These are the products I used from the STAMPlorations Shop to make my card.


That's it from me for today. Wishing you a lovely week.
hugs
Monika ❤

Thursday, October 21, 2021

{Spotlight Project} Maria Uses The Spotlight Technique With Ephemera


Hello STAMP friends! How are you enjoying the newest addition to the STAMP family - Paper Goods, specifically Ephemera? I tried the spotlight technique with one of the ATCs for today's post. Let's take a look.


Thursday, October 07, 2021

{Spotlight Project} Stencilled Poinsettia With Monika


Hi STAMPLorations Friends! Today I'm seeing things differently for my 'non Christmas product' Christmas card. Have a look: