SHIPPING BREAK COUNTDOWN
Order by 5 PM Pacific Time today to have your order shipped before our break!
00 DAYS 00 HRS 00 MIN 00 SEC
Showing posts with label Chris Dring. Show all posts

Friday, September 11, 2026

Found Fragments Beyond Cardmaking with Chris

Who says stamps are just for cards?

STAMPgirl Chris has created a fantastic mixed media canvas featuring Found Fragments #2, and I love how she shows just how far you can take these stamps when you step outside traditional cardmaking.

She started with a 5" x 7" canvas and built up a colorful painted background before adding the Dragonfly Waltz stencil. She then stamped Found Fragments #2 around the edges, creating another layer of texture and visual interest. The Faces: Gorgeous stencil adds even more dimension, while a sentiment from Simple Expressions: Glow gives the canvas a meaningful focal point. To finish it off, Chris added flowers from the Floral Parade Ephemera Cut-Outs, fussy cutting the pieces and popping them up with foam squares.

What I really love about this project is how many different STAMPlorations products come together here. Found Fragments provides the stamped texture, stencils add pattern and dimension, the sentiment brings in the words, and the ephemera cut-outs add those final pops of color and detail. And none of it had to happen on a card.


Think Beyond the Card

Chris's mixed media canvas is a great example of why I love designing products that can work together in different ways. Found Fragments stamps aren't limited to backgrounds on cards. They can become part of a mixed media canvas, art journal page, tag, scrapbook project, or anything else you want to create.

The same goes for our stencils, sentiment stamps, and ephemera cut-out sheets. Mix them together, layer them up, and see where they take you.

Want to see how Chris created her canvas? She walks through the entire process, including how she built the painted background, layered the stenciling and Found Fragments stamping, added the sentiment, and finished the piece with Floral Parade flowers.

Read Chris's full Found Fragments mixed media canvas tutorial

Until next time, keep creating beyond the card!


Friday, September 04, 2026

Perfect Pairs: Classic Christmas with Chris

If you love creating beautiful handmade cards but don't want to spend a lot of time figuring out which stamps, images, and embellishments work together, Perfect Pairs was designed with you in mind.

Each Perfect Pairs collection combines a coordinating two-stamp set with a pack of coordinating ephemera cuts. The stamps and ephemera were designed together, so the colors, images, sentiments, and overall style work seamlessly together.

In today's post, STAMPgirl Chris shows us just how easy it can be to create with Perfect Pairs: Classic Christmas. Her two cards use the coordinating stamps and ephemera cuts with just a few simple additions, but the results have two very different looks.


Keep It Simple With a Touch of Gold

For her first card, Chris stamped the Classic Christmas definition stamp over her card base using gold ink, then added the sentiment in black. That's it for the stamped background. To finish the card, she added one of the gorgeous lantern ephemera cuts from the coordinating pack.

The subtle gold definition background gives the card a vintage feel, while the lantern creates an instant focal point. It's a beautiful example of how little you need when the elements are already designed to work together.


Mix Your Own Embossing Powder

For her second card, Chris wanted to add embossing around the edges of her panel, but she didn't have an embossing powder in the right color to coordinate with the mercury ornaments. Her solution? She mixed silver and gold embossing powders to create her own custom metallic blend.

After heat embossing the sentiment, Chris decided the card needed even more sparkle, so she sprinkled some of the mixed powder randomly over the panel and heated it from underneath. She then added the coordinating ornament ephemera cuts. The result is full of gorgeous metallic shine, with the mixed silver and gold giving the card exactly the look she was after.

And sometimes the best creative solutions come from simply working with what you already have.


One Collection, Lots of Possibilities

What I love about Chris's two cards is how different they look even though they're both made with Perfect Pairs: Classic Christmas. The first is simple and elegant, with a subtle gold background and one beautiful lantern doing most of the work. The second is all about metallic shine, with mixed embossing powder and a cluster of ornaments creating a completely different feel.

That's the beauty of Perfect Pairs. The coordinating stamps and ephemera cuts give you a natural starting point, so you can keep things simple or add a little of your own creativity along the way. Try changing the ink color, adding a little embossing, or combining different ephemera pieces. And if you don't have exactly the color or finish you're looking for, don't be afraid to experiment with what you already have.

Whether you're making a stack of Christmas cards or creating one special card at a time, Perfect Pairs: Classic Christmas makes it easy to get started.

Explore Classic Christmas and the other Perfect Pairs collections in the STAMPlorations store.

Until next time, keep creating with confidence -- and let Perfect Pairs do the coordinating.


Tuesday, September 01, 2026

Perfect Pairs, Expanded | Party & Wishes with Chris

Perfect Pairs is designed to make cardmaking easier. The coordinating stamps and ephemera cuts give you a ready-made combination, so you can create a cohesive card without spending a lot of time figuring out what goes with what.

But once you've played with the collection on its own, there's no reason you can't take it further.

That's exactly what STAMPgirl Chris did with Perfect Pairs: Party & Wishes. She brought in other stamps, stencils, dies, and coloring supplies to create three cards that take the collection well beyond its quick-and-easy core style.

I like to call this Extended Style -- starting with a Perfect Pairs collection and then building on it with other products to create a more layered, personalized design.


Put Your Own Spin on the Pair

For her first card, Chris added stamps from the Art Marks stamp set and took a little inspiration from one of my cards. She masked the Party & Wishes sentiment stamp so she could use just the word Celebrate in the bottom corner, then stamped it again using second- and third-generation stamping.

I love what that does to the card. The repeated, faded impressions add a grungy feel to the design, while the Party & Wishes ephemera gives it a colorful focal point. And yes, Chris really did put her own spin on it. That's exactly what Extended Style is about.


Build Your Own Background

For her second card, Chris started by stenciling a rainbow of colors through the Confetti #1 slimline stencil. She then die cut the stenciled piece using a Curly Labels/Tags Nesting Die and used it as part of her card design. She white heat embossed sentiments from the Sweet Cravings stamp set and used foam squares to pop up both the sentiments and the delicious-looking cake ephemera. She even carried the celebration to the inside of the card with the Celebrate Big stamp.

It's a great example of how a Perfect Pair can provide the focal image while you create a completely different supporting background around it.


Turn the Ephemera Into a Scene

For her third card, Chris took the party theme in another direction. She started by stenciling clouds onto her card base, then heat embossed a bird from the Birds of Paradise stamp set onto mixed media paper and colored it with a water brush and Derwent Inktense Blocks. She stamped a sentiment from the same set and then added the Party & Wishes balloon ephemera and the bird with foam squares. To finish the scene, she hand drew the lines connecting the balloons to the bird.

I love the personality this adds to the card. The balloons aren't just decorative elements anymore. They become part of the little scene Chris created around the bird.


Creative Takeaway

Perfect Pairs gives you a coordinated starting point, but it doesn't have to determine where you finish. Once you know the colors, images, and sentiments work together, start looking around your stash for things that can add to the same idea.

A texture stamp can change the mood. A stencil can give you a completely different background. Another stamp set can add a character or image that turns your ephemera into a scene.

And don't be afraid to borrow an idea and put your own spin on it. Chris did exactly that with her first card, taking inspiration from one of my designs (the birthday candles card in this post) and making it her own.

Think of Perfect Pairs as your foundation. Then add whatever helps tell the story you want your card to tell.


Discover What's Possible

Every Perfect Pairs collection is designed to work beautifully on its own, but there's plenty of room to take it further. Use the coordinating stamp and ephemera cuts for quick and easy cards, or bring in your favorite STAMPlorations stamps, stencils, dies, and other supplies for an Extended Style design like Chris's.

Perfect Pairs: Party & Wishes is available as the coordinating stamp set, the coordinating ephemera cuts, or the complete Perfect Pairs collection.

Explore Party & Wishes and the other Perfect Pairs collections in the STAMPlorations store.

Until next time, keep creating with confidence -- and let Perfect Pairs do the coordinating.


Wednesday, August 26, 2026

Perfect Pairs: Party & Wishes | Two Quick and Easy Birthday Cards with Chris

One of the things I love about Perfect Pairs is that the coordinating stamps and ephemera cuts make it really easy to put a card together without having to spend hours figuring out what goes with what.

STAMPgirl Chris put that to the test with two birthday cards using Perfect Pairs: Party & Wishes and the coordinating ephemera cuts. And when I say quick, I mean quick. Her first card took about 10 to 12 minutes, while the second one came together in about 5 to 6 minutes, not counting the time it took for the Stickles to dry.

That's a record for Chris, who says her cards usually take her two to three hours to make. I had to chuckle when I read that :-o)


Keep It Simple With a Pop of Color

For her first card, Chris stamped the Party & Wishes background stamp in a zigzag pattern using three ink colors that coordinate with the party hat ephemera cut. She then tore a strip of white cardstock, stamped the sentiment at the bottom, and added the strip and party hat to the card base.

I really like how the colorful stamped background frames the party hat without competing with it. The torn strip of cardstock gives the eye a place to rest, while the coordinating colors tie everything together. Simple. Colorful. And done in about 10 minutes.


A Little Masking Goes a Long Way

For her second card, Chris kept things just as simple but changed up the design. She masked off an area of the card base and stamped the Party & Wishes background stamp diagonally inside the masked area. For the sentiment, she masked off part of the stamp so she could use just the word "Celebrate" in the bottom right corner. She then added gold Stickles to all the sprinkles on the cupcake ephemera cut. Once the Stickles dried, she popped the cupcake up with foam squares for a little dimension.

I love that she didn't feel the need to use the entire sentiment stamp. Sometimes one word is all you need. And the little bit of sparkle on the cupcake? Just enough.


Let the Pair Do the Work

Chris' two cards are a great example of how much you can do with the Perfect Pairs: Party & Wishes set and its coordinating ephemera cuts without bringing in a whole pile of other supplies. The background stamp gives you an easy way to add color and pattern, while the ephemera cuts give you ready-to-use focal images that already coordinate with the stamps. Then it's just a matter of changing up the arrangement. A little masking here. A torn strip there. Maybe some Stickles if you're in the mood for a little sparkle. That's it.

And if you're looking for cards you can put together without spending hours on each one, Chris's 5-to-12-minute cards are pretty good proof that Perfect Pairs really can make cardmaking easier.

Check out Perfect Pairs: Party & Wishes and the other Perfect Pairs collections in the STAMPlorations store.


Friday, August 14, 2026

Creative Tip of the Day: Three Ways to Use Cover Plates

Cover plates are incredibly versatile. You can use them to create texture, highlight just part of their design, or turn the entire die-cut panel into a bold background. These three projects from the STAMPlorations archives show just how different the results can be depending on how you use the same type of die.

Create Texture Instead of a Die-Cut Background


Deepti started with watercolor cardstock and used the Zen Doodled Birthday Cake Cover Plate Die to emboss the cardstock, creating a subtle textured pattern rather than cutting the panel apart. She then watercolored the embossed panel in bright, vibrant colors. To finish the card, she heat embossed a sentiment from the Birthday Bash stamp set and added white pigment splatters.

It's a great reminder that a cover plate doesn't always have to be used to create a separate die-cut layer. Try embossing with the die instead to add texture to your background while keeping the cardstock intact.


Use Only Part of the Design

This card uses the Bloomtangled #1 Cover Plate in a different way. Rather than using the entire die-cut panel, I kept the top portion of the design and left the bottom of the card base clean. That open space gave me a perfect place to stamp the sentiment from the Bold Sentiments: Fearless stamp set. Keeping the cover plate design confined to one area of the card gives the intricate die-cut plenty of room to shine without overwhelming the sentiment.

Don't be afraid to trim, cut, or use only part of a cover plate. You don't have to use the entire design just because that's the size of the die.


Make the Entire Die-Cut the Star

Chris took the opposite approach and let the entire Zen Doodled Birthday Gifts Cover Plate create a bold, colorful background. She die cut it from festive patterned paper and adhered it to a black card base, allowing the bright colors and intricate design to really pop. For the sentiment, she cut the Celebrate Big phrase die three times from purple cardstock, stacked the layers together for dimension, and added Stardust Stickles for sparkle. She then cut it again from white cardstock and adhered it offset underneath the stacked sentiment to create a contrasting shadow.

Here, the cover plate does become the full background, but the strong contrast and dimensional sentiment keep the card from feeling visually flat.


Think Beyond the Obvious


The next time you reach for a cover plate, think beyond simply running it through your die-cutting machine and adhering the resulting panel to your card. Try embossing with it for subtle texture. Use only a portion of the design to create an interesting border or focal area. Or embrace the entire die-cut and let it become the star of your background.

There isn't one “right” way to use a cover plate. The fun is in deciding how much of the design you want to see -- and how you want it to work with the rest of your card.

And if you've had your eye on a CUTplorations cover plate -- or another die you've been meaning to try -- all CUTplorations dies are 15% off during our August sale. It's a good time to experiment with a few new ways to use the dies already in your stash, too.

Until next time, keep creating and looking at your supplies in new ways.


Friday, August 07, 2026

words that matter | BELIEVE + Watercolor ATC with Chris Dring

Some words encourage us to look outward. Others remind us to look inward.

When I designed BELIEVE, I wanted it to be a gentle reminder that confidence doesn't begin with what others think of us -- it begins with recognizing our own worth. Sometimes the most important thing we can do is believe in ourselves before anyone else does.

Today, STAMPgirl Chris pairs BELIEVE with our Watercolor ATCs, creating two thoughtful cards that beautifully reinforce that message.

For her first card, Chris combined one of the Watercolor ATCs with a colorful strip from the Industrial Patchwork Collage Paper collection. She added a die-cut trio of perched birds* atop the softly textured watercolor background, enhanced with the Circles All Over Texture Plate Die. The layered elements create wonderful depth while keeping the design clean and balanced.

I especially like the symbolism of the birds perched together. Paired with the sentiment, Believe in your worth, they quietly suggest encouragement, companionship, and the confidence to keep moving forward.

(*The bird die Chris used is sold out, but our Perched Bird Die makes a wonderful substitute.)

Her second card takes a softer, more understated approach. Chris die-cut one of the Watercolor ATCs using a Curly Labels/Tags Nesting Die, making it the perfect focal point for the sentiment. Behind it, she created a kraft panel stenciled with Christmas Tree #1, then framed everything with stitched layering before mounting it onto the card base.

Although the stencil was originally designed as a Christmas pattern, the repeating trees become a simple geometric background here -- proof that many crafting supplies can be used far beyond their intended season.


Creative Takeaway

One of my favorite things about paper crafting is discovering unexpected ways to use the supplies already in our collection. For example, a holiday stencil can become an everyday background. Or an ATC can become a sentiment panel. And a collage paper strip can add just the right amount of color and texture without overwhelming a design.

Chris' cards are wonderful reminders that creativity often comes from looking at familiar products in new ways. When we stop thinking about what a product was designed for and start thinking about what it could become, our creative possibilities grow dramatically.

Perhaps that's another way to think about today's word: Believe -- not only in your worth, but also in your creativity.


Discover What's Possible

Pair any Simple Expressions stamp set with one of our qualifying Paper Goods collections -- including Card Fronts, Artist Trading Cards (ATCs), Collage Sheets, Pocket Backdrops, or Ephemera Cut-Out Sheets -- and discover how effortlessly they work together.

Right now, purchase any Simple Expressions stamp set and add one qualifying Paper Goods pack to your order for 40% off. It's the perfect opportunity to build your collection while discovering combinations that inspire your own creative style.

Until next time, keep creating with words that matter.


Tuesday, August 04, 2026

words that matter | GLOW + Things with Wings with Chris Dring

Some words don't ask for attention -- they quietly remind us of who we're meant to be. GLOW is one of those words.

When I designed this Simple Expressions set, I wasn't thinking about bright lights or bold colors. I was thinking about the kind of glow that comes from within: kindness, hope, faith, joy, and the quiet confidence that shines through the way we live our lives.

Today, STAMPgirl Chris is pairing GLOW with our Things with Wings Card Fronts, creating two beautiful cards that capture that idea in two completely different ways.

For her first card, Chris selected a softly painted butterfly card front and enhanced it with a few touches of glitter to the butterfly's body and antennae. The sparkle is subtle, but it immediately draws your eye, reinforcing the message of GLOW from within. By placing the sentiment across the lower portion of the artwork, she creates a clean, balanced design that lets both the image and the message share the spotlight. It's a wonderful reminder that sometimes the smallest detail can reinforce the biggest idea.

Her second card features a beautifully illustrated bird card front framed with torn edges and layered onto a dark mat for added contrast. A scattering of bright orange sequins echoes the warm tones of the bird and brings just enough sparkle and movement to the design. The placement of the sentiment near the top allows the bird to remain the focal point while tying the entire composition together. The torn edges add softness and texture, giving the finished card an organic, handcrafted feel without taking away from the artwork itself.


Creative Takeaway

One of the things I enjoy most about pairing the Simple Expressions stamps with our Paper Goods is seeing how the same word can take on a different personality depending on the imagery around it.

With the butterfly, GLOW feels delicate and quietly radiant. With the bird, it feels warm, hopeful, and full of life.

That's the beauty of working with thoughtfully coordinated products. The sentiment remains the same, but the surrounding artwork helps tell a slightly different story each time you create. Sometimes all it takes is one meaningful word and one beautiful background to create a card that speaks volumes.


Discover What's Possible

Pair any Simple Expressions stamp set with one of our qualifying Paper Goods collections -- including Card Fronts, ATCs, Collage Sheets, Pocket Backdrops, or Ephemera Cut-Out Sheets -- and discover how effortlessly they work together.

Right now, purchase any Simple Expressions stamp set and add one qualifying Paper Goods pack to your order for 40% off. It's an easy way to build your collection while discovering new combinations that bring your handmade cards to life.

Until next time, keep creating with words that matter.


Tuesday, July 14, 2026

Words That Matter | SPEAK + Artsy Abstracts with Chris Dring

One of the things I enjoyed most while designing the Simple Expressions collection was thinking about how just a few thoughtfully chosen words can become the heart of a handmade project. Sometimes it's the sentiment that catches our attention first, and sometimes it's the one thing the recipient remembers long after they've put the card away. That's exactly what inspired this collection -- bold, layerable typography that lets the words take center stage.

Today I'm delighted to share two wonderful projects that Chris Dring created using our SPEAK Simple Expressions stamps paired with our Artsy Abstracts Card Fronts. I love that she approached the same products in two completely different ways, showing just how versatile they can be.

For her first card, Chris paired on of the colorful Artsy Abstracts Card Fronts with a striking portrait from the Retro Femme ATC Pack. What caught my eye was how the portrait becomes the focal point while the SPEAK beautiful things sentiment naturally grounds the design. The black enamel dots echo the splatters in the background, creating a wonderful sense of balance without taking attention away from the focal image.


Her second card has a completely different feel. This time, the card front takes center stage, with the sentiment stamped directly onto the background. Chris also added subtle faux texture using our retired Mixed Media Grunge stamps, giving the design a little extra character while keeping the overall look clean and artsy. I love how this card proves that a meaningful sentiment and an expressive background can be all you need.

A Thought to Take With You

Today's featured word is SPEAK.

Words have an incredible way of building people up. Whether they're spoken, written inside a card, or quietly read during someone's day, kind words have lasting impact. I hope this little reminder encourages you to speak beautiful things -- not only to the people around you, but to yourself as well.

If you'd like to see the rest of the Simple Expressions collection, I'd love for you to stop by the shop and take a look. There are 18 expressive designs, each created to celebrate the words that matter most.

And don't forget our launch special. When you purchase any Simple Expressions stamp set, you can add one coordinating Paper Goods Pack at 40% off. Mix and match with our Card Fronts, ATC Packs, Collage Sheets, Pocket Backdrops, and Ephemera Cut-Outs Sheets to build a creative toolkit that's ready for cards, journals, tags, mixed media projects, and so much more.

Until next time, keep creating with words that matter.


Tuesday, May 12, 2026

{Card Fronts Spotlight} Junk Journal Vibes with Chris

Hello everyone! Today we're diving into the wonderful world of texture and layers with a fantastic set of projects from STAMPgirl Chris. If you love the eclectic, artistic look of junk journals but want to translate that style onto your cards, you're in for a treat!

Chris has masterfully used our Junk Journal Collage card fronts as the foundation for these four unique designs, proving just how versatile these "instant art" backgrounds can be.


Monday, March 23, 2026

🌸 Spring ATC Small-Format Inspiration with Chris🌸

We are back with more inspiration featuring our newest ATC Packs: Retro Femme, Color Me Spring, and Whimsical Homes. Today, Chris shows us how easily these tiny artist trading cards can be incorporated into stunning, fully realized card designs. 🎨✨

Let’s take a look at Chris’s gorgeous projects:

Thursday, March 19, 2026

☕️ Springtime Sips: Chris’s Vintage Coffee ATC Collection ✨🌷

Our new Springtime Coffee ATC pack is here and ready to bring a touch of vintage charm to your craft desk. 🌸☕️ These 2.5" x 3.5" canvases feature beautifully detailed images that are a dream to color. Chris has put together a trio of projects that perfectly showcase how these ATCs pair with our Shine Bright clear stickers.


Sunday, March 08, 2026

Crafting with The Coffee House: Brew-tiful Inspiration from Chris ☕️✨

If you’re a coffee lover and a paper crafter, you’ve just found your new favorite stash! Today we are shining a spotlight on The Coffee House collage paper pack—a collection that perfectly captures the warmth of a fresh brew and the cozy vibes of a local cafe. Whether you're documenting your morning routine or sending a "latte" love to a friend, these papers provide the perfect caffeine-infused foundation. ☕️📜

Thursday, March 03, 2022

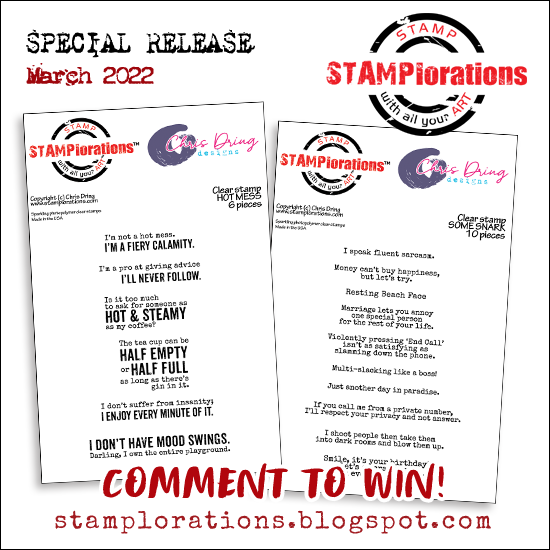
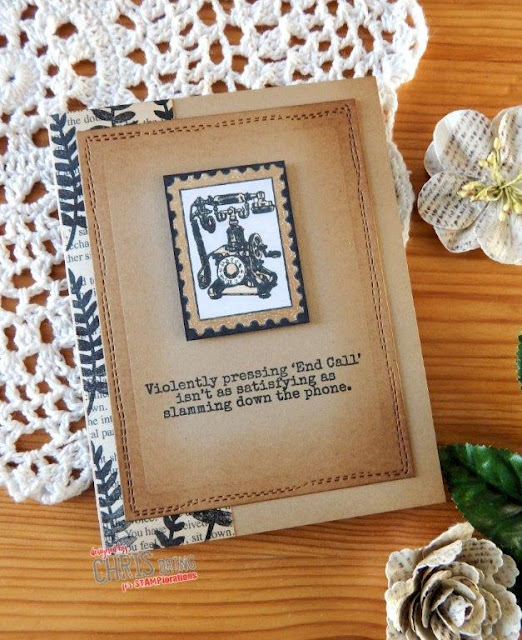
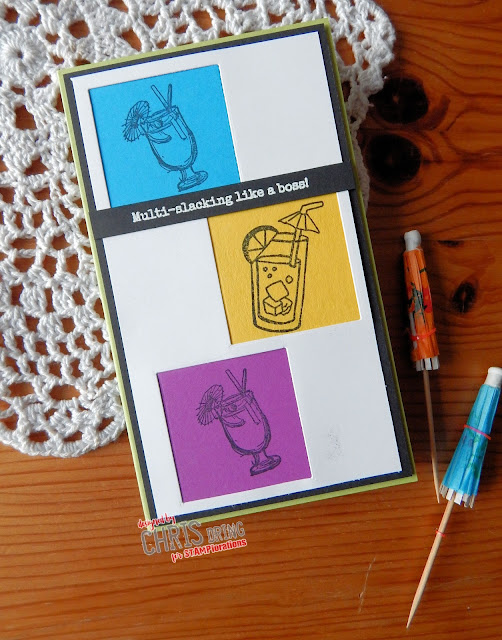
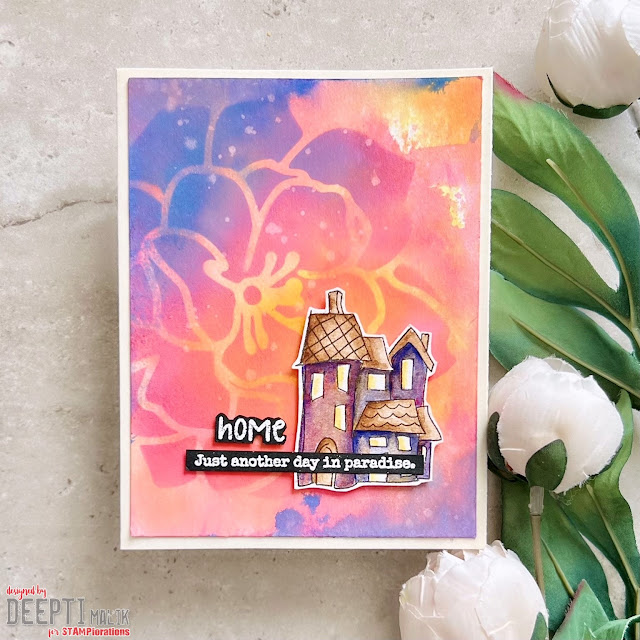
{Special Stamp Release} Some Snark from Chris Dring Designs


Hello again, STAMPlorations friends! We're doing a special release of stamps by our very own Chris Dring. If you're looking for some clean snarky sentiments, her stamps are it!


Today, we're putting the spotlight on Some Snark. Comment on this post and on the STAMPgirls blog posts by March 8 for a chance to win your choice of Chris Dring Designs stamp set. We'll announce the winner on March 10.
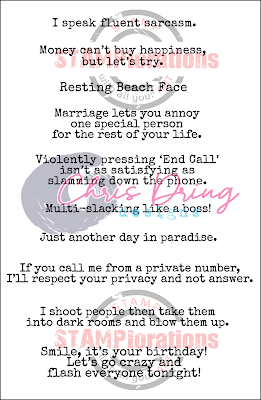


Have a look at what Chris and the Inspiration girls made and then check out the pre-order offer we have for these sets.


What do you think of Chris' second set and the STAMPgirls' projects? If you missed the post featuring her first set, it's here. We hope you enjoyed seeing all the projects featuring Chris' stamps.