


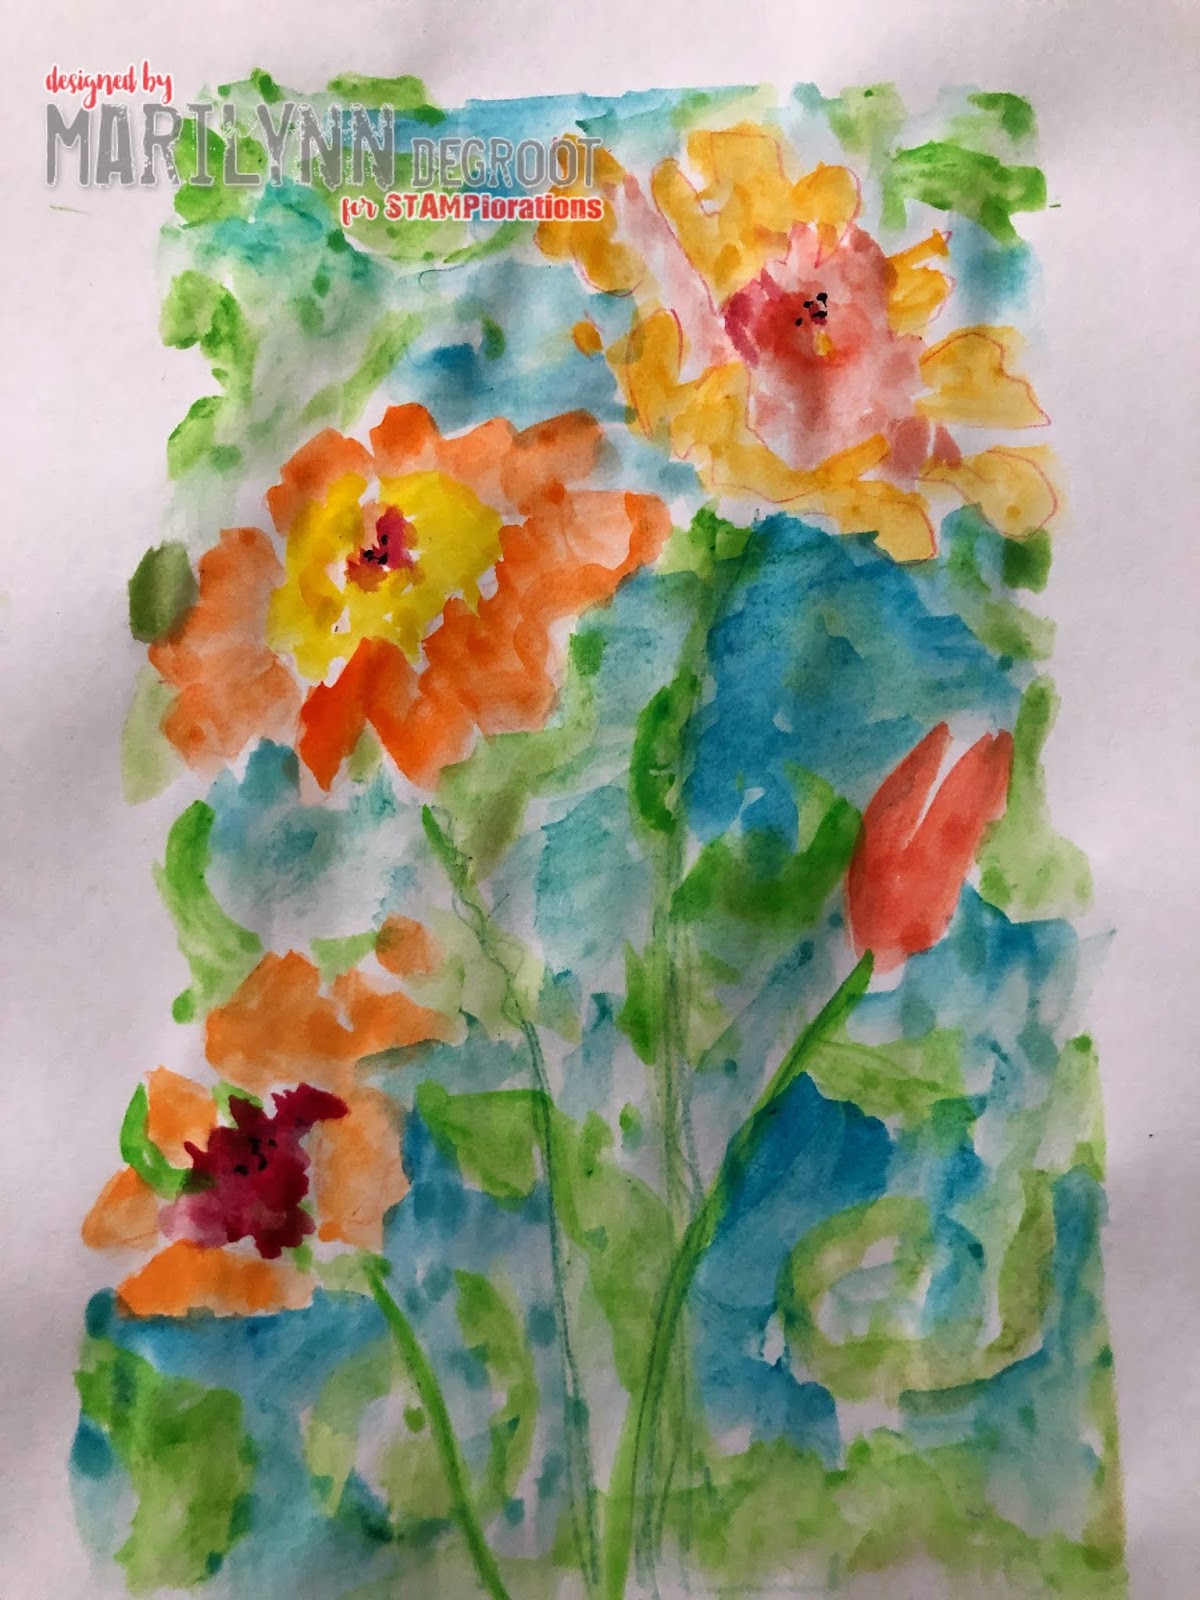
I have a super fun mixed media tutorial I will call watercoloring with stencils.

I will tell you right now that I am not an expert when it comes to watercoloring, but practice helps make us get better, right? I did this on plain white typing paper. I did that on purpose, because it takes away the fear factor. It is just a piece of paper. If I mess up, no big deal.
I placed the Happy Flowers stencil onto the paper.

Then I took out some colored pencils. And from this photo on the box you can see I didn't spend a lot of money on these pencils. If you have more expensive pencils you can use them but they aren't necessary.

I picked these 3 shades of orange.

I used the pencils to trace the flowers using the stencil.

I also did the stems of the flowers using a green colored pencil.

Next I got out my watercolor set. It is a nice set but just a step above the crayola watercolors that I played with as a kid.

I took some yellow and colored the first flower. Notice how I colored outside the lines. I did that on purpose. I wanted to use the lines just as a guide.

Next flower I colored with orange. Again just using the lines as a suggestion.

I did a darker shade of orange for the closed up bloom.

And for the last flower I used a different shade of orange to watercolor it in.

This next step is when it got really fun. I took the Flourishes stencil and I laid it down over the flowers.

I used a shade of green paint and painted in the "holes" of the stencil.

This is how it looked after I painted through the Flourishes stencil.

The Flourishes stencil still left lots of white space. In that white space I painted blue. The key to this step looking good is to leave some white spots. I didn't color it in solidly.


See how much white is still left in the blue areas?

For the flowers I took a contrasting color to color in the centers.


Here is how it looked when I finished coloring in the centers.

Then to add even more interest, I added purple to the centers of the flowers.
That was all I did with the water colors. I then took a black ink pen and drew dots in the very centers of the flowers.


The last touch I did was to scribble on the stems of the flowers with a dark green colored pencil. I also scribbled on the lightest flower with a red colored pencil.

I took this painting and cut it down to fit inside my bible. I hand lettered the words, "FLOWERS OF THE FIELD." I put it in my bible at 1 Peter 1:24-25. I have been practicing hand lettering for over a year now. Again practice make perfect.
I hope that this simple project encourages you to play along. Remember: it doesn't have to be perfect to be art. Blessings.
Wow, what a great tutorial...I loved the step by step and pictures to go with it...this turned out awesome....I really have to give this a try.
ReplyDeleteThank you for sharing it.
Very pretty!
ReplyDeleteSo very pretty and a great tutorial showing us how you did it.
ReplyDeleteThanks for sharing this. Your step by step instructions were clear and easy to follow.
ReplyDeletewhat a gorgeous page, and so simply put together. I love that concept of using two stencils - thank you MariLynn
ReplyDeleteBlessings
Maxine
You make it look perfect. It's beautiful!
ReplyDeleteWow! This is very cool! The addition of the black dots in the center of the flowers really makes everything pop!
ReplyDeleteWhat a gorgeous way to use this stencil!
ReplyDeletegorgeous!
ReplyDelete🎅🎄 Happy Holidays! ⛄❄
BEAUTIFUL!
ReplyDeleteTHANK YOU for sharing how you built up the lovely layers of this design!