
Happy Wednesday! Digital Wednesday is back every 2nd and 3rd Wednesday during our summer break (July, August, and September). We have guest designers sharing their creations spotlighting our digital images either by themselves or together with other STAMPlorations products. We'll draw one lucky crafter to win a $15 gift code -- randomly drawn from all comments left on the Digital Wednesday posts for the month, as well as from the featured designers' blogs.
The super talented Ishani is back to share one more batch of her gorgeous cards featuring STAMPlorations digital stamps. Today she delves into heat embossing.


Here's Ishani with her cards:
I wanted to make a post specifically, to show you the endless possibilities of using heat embossing technique with digital stamps. Let me tell you, how I do heat embossing for digital images. My skills with computer are limited and I use Microsoft Word and an inkjet printer for my printing. But if you have printed from inkjet printer you would know that the ink remains a little wet. My printer is over 8 years old so I am always careful else, the ink smears in first few seconds. and if image does not properly dry, it bleeds when I watercolor. So why not take it to my advantage, I thought, the fact that the ink remains wet!
I wanted to watercolor my heat embossed images so I chose water color paper to print my digis on. I used this paper which is 250 gsm and easily gets fed in the printer. What you have to remember is to keep fans off and choose a warm room for printing, preferably with no AC on. Use an anti- static powder tool on the correct side of the paper that will have the print coming out on. Feed the paper and be ready with your embossing powder. As soon as the print is out, immediately put the clear embossing powder and then heat set it. You can see the process here.
Card #1 The Rustic Greek Window
Since the time I got the stamp Rustic window, I have been thinking of making it a window similar to the Greek town - Santorini's . I resized it to make it larger as I wanted the window to be the focus What I love about digital stamps the most is, that you can resize it to the proportions you want!
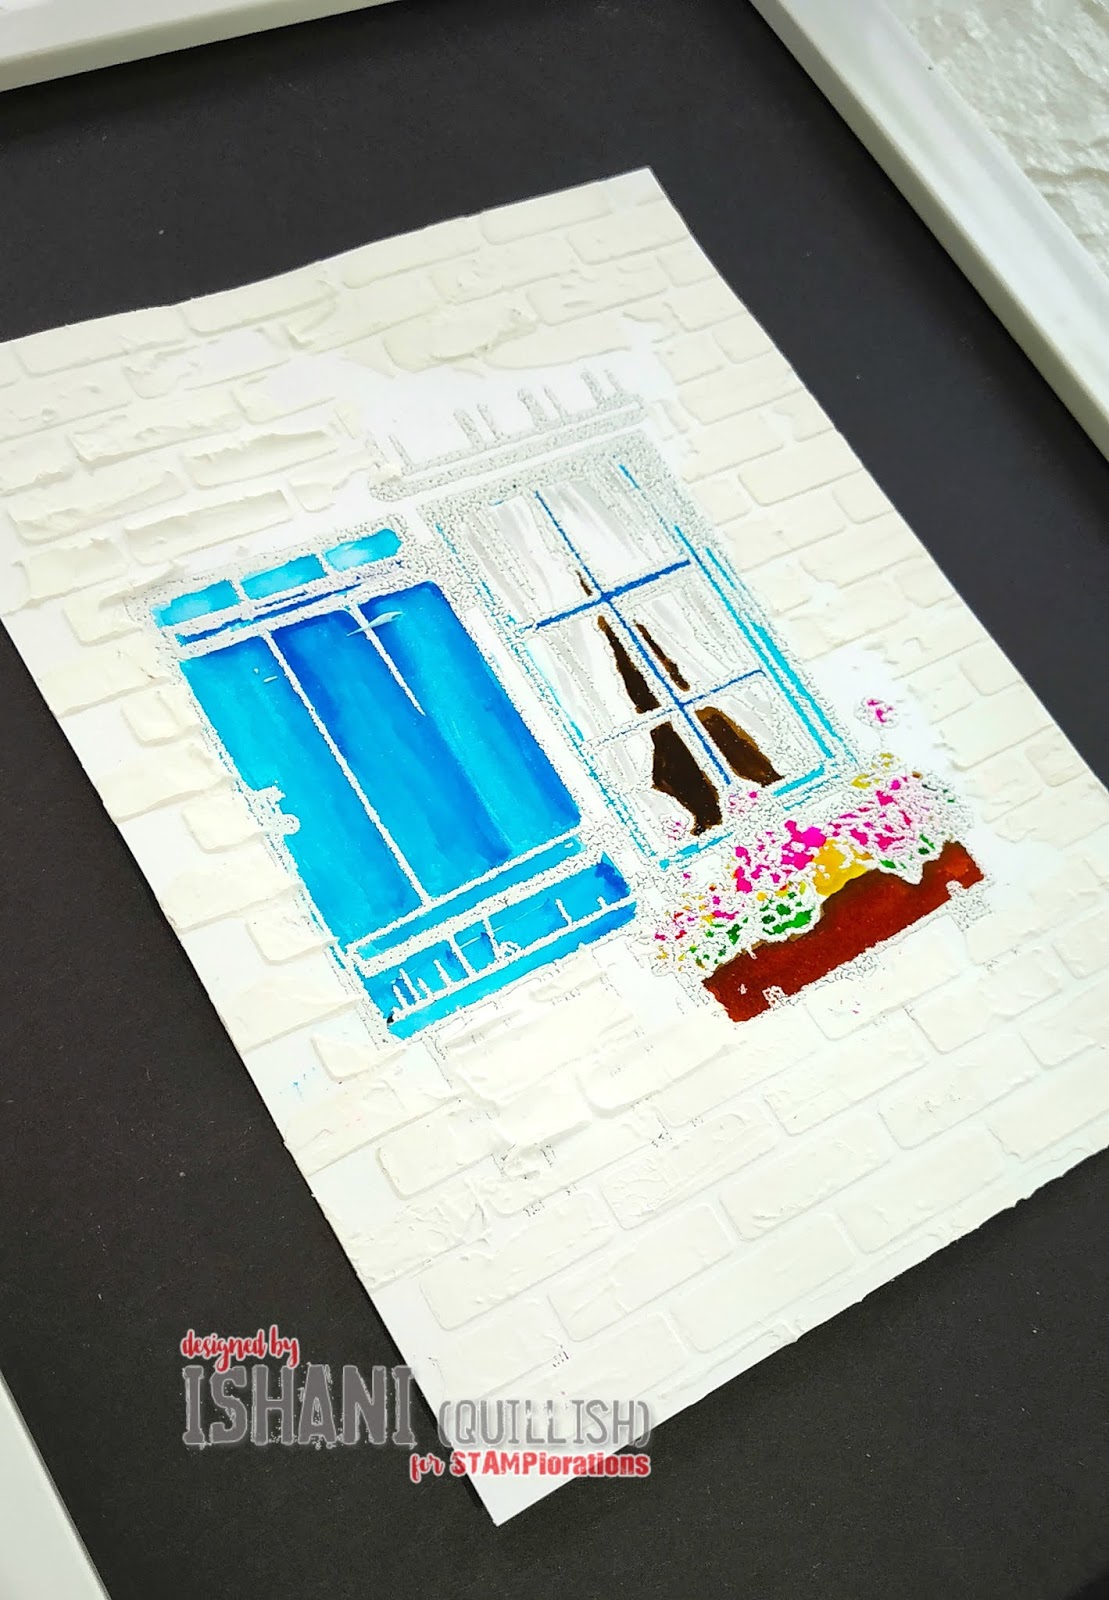
I printed my image by keeping it in the centre of the paper and immediately after the print, heat embossed it with white embossing powder. I colored with Zig markers and used a brick stencil for making my wall with texture paste.

I could have turned it into a card by trimming it but I thought of framing it.

Till the time, the world gets back to being like good old days, this is how we can travel, through our art work :D I hope you get a glimpse of Santorini too from this project!
*****
Card #2: Heat Embossed Macaroons
For the next card I used Sugar Rush digital stamp, printed on the same watercolor paper, heat embossed with white embossing powder and colored with Zig brush pens.

I couldn't decide which flavour to make and because I follow -when in doubt, do a rainbow, I did the same. I mounted my watercolored panel on black cardbase and stamped a sentiment.

You are free to imagine, which flavours these macaroons are. This is the only time I wished that a Rainbow had brown too :P Let me know, which is your favourite macaroon?
*****
Card #3: Golden Poinsettias Row
Now that we have dreamed about a vacation and got some sugar rush, why not get ready for Christmas? I arranged the two Poinsettia rows from the Sketched Christmas flower and Poinsettia row digital stamp in a word document, typed Merry Christmas in the center and printed the images. As soon as I had the print, I put gold embossing powder and heat embossed it.

I colored the images with Zig markers, just some loose watercoloring and mounted the panel on red notecard, with double sided foam adhesive. Quick and simple!

Hope you enjoyed the ideas and would try them yourself. If you would like to see more details of how I made this and some more photos then please pop on over to my blog here.
Wishing you a lovely day. Stay safe and healthy and keep crafting.
Hugs
*****
In the meantime, check out our digital store. You can take 15% off your order with the code ZHW67UC. The code is good to use on the digital store multiple times throughout September.
I never seem to be quick enough for this process, but I will keep trying
ReplyDeleteThese are all sooo gorgeous! Thank you for the step by step! I LOVE the poinsettia!
ReplyDeleteBeautiful cards and great technique.....awesome and TFS
ReplyDeleteSimply gorgeous!!
ReplyDeleteWonderful projects using heat embossing for these digital images. thanks for all the tips.
ReplyDeleteBeautiful work
ReplyDeleteand love the
colorful macaroons.
Carla from Utah
These are all so beautiful but especially the rustic Greek window draws me in!
ReplyDeleteWhat lovely projects!
ReplyDeleteThanks for the information
on how to heat emboss digital
images. I hope to try it soon!
Amazing projects - I especially love thew rainbow of macaroons :)
ReplyDeleteStay safe
Blessings
Maxine
The macaroons sure look good enough to eat! lol
ReplyDeleteGorgeous cards!
Gorgeous cards!
ReplyDeleteBEEEEEAUUUUUUUUTIFUL CARDS!
ReplyDeletewow, absolutely stunning and I have to try this!
ReplyDelete