The STAMPgirls will be sharing projects featuring Flexi-Templates in October when we do our belated 7th birthday celebration (yes, we are still celebrating it!). But who better to show us how to use Flexi-Templates than the designer herself?
Hello STAMPlorations Friends! It's Monika here today introducing you to the new kid on the block -- our new 5 sets of Flexi-Templates: Circles, Ovals, Triangles, Rectangles, and Squares -- designed by myself.
The idea was to have some shapes that can be used flexibly in multiple ways to create frames, backgrounds, patterns and much more. The Flexi-Templates are a good way of adding layers without adding bulk to a card. They can be used on their own or in combination with stencils and stamps to add texture.
Let me show you a few easy ways of using them to start with.
I used inks and brushes for blending. The frames can easily be secured to the cardstock with repositionable tape. The background was made before I decided to take photos hence I simply placed the Flexi-Template segments on.
I started with the inner turquoise square before masking it with the smaller segments and removing the one for blending the darker frame.
Before stamping the flower and grasses, I removed the segments from the inner turquoise and added the one over the darker frame again to act as mask.
A doodled border and stamped sentiment finished my card off.
*****
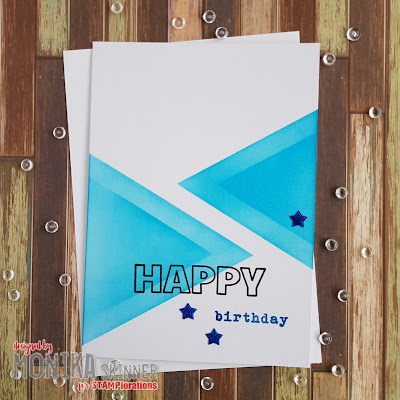
I started off with the largest shape and lightly blended with turquoise before adding my smaller segment and blending with the same colour. The same pattern was sponged on the other side of my card.
A bold sentiment and stars finished my card off.
*****
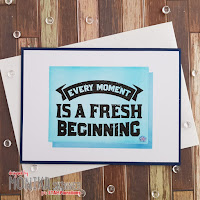
The turquoise rectangle was sponged slightly offset to the right and the top. This was to allow for the shadow and would roughly keep my background central.
I then masked as shown in the second photo and sponged the darker blue for the shadow.
A Typogeafia sentiment and a little flower finished my card off.
*****
Again I had made the background before photographing it. The Beyond the Trees stencil got secured to the card first before all the ovals were used apart from the center one which I sponged with yellow. I then removed the next oval element and sponged with orange slightly overlapping with the yellow. I continued removing the elements in turn and sponged with red and purple to finish my background.
The little fairie and sentiment from the Fairie Door set were perfect for the magical wooded background.
*****
Before starting to get inky, I secured all the circles together on the reverse side and put them aside while I was blending my ink for the off-the-page circle. I then layered the elements of the circles template to give me a crescent shape, aligned it as shown in the photos and blended with inks.
A bit of spritzed water, stamping and sequins finished my card off.
*****
I hope you enjoyed my little introduction to the new Flexi-Templates and that it has given you some ideas on how they can be used. I shall incorporate them into a few more of my projects over the next few weeks as I continue to experiment and play with them. For now you can look forward to Tuesday's Inspiration Post and Wednesday's Christmas In The Air feature where I will showcase more ways of using the Flexi-Templates.
That's it from me for today. Hope you're having a lovely week!
hugs
Monika xxx
here is what I used from STAMPlorations:
Main Store:


Outlet Store


A brilliant concept
ReplyDeleteWhat a creative new product! Love all your cards, especially the last one!
ReplyDeleteYou are so creative and thank you for this fabulous inspiration! So colorful and am in love with your work!
ReplyDeleteI did enjoy all of your cards and appreciate you sharing the technique.
ReplyDeleteOk - these are just the coolest!!
ReplyDeleteCongratulations, Monika! They are amazing designs. I love that triangle one. Pretty cool CAS card.
ReplyDeleteLove all of the shapes, especially the triangles. Congratulations on the new tools!
ReplyDeleteExciting new product!
ReplyDeleteCongratulations Monika on your new product line! Love the way you used circle Flexi template, so unique.
ReplyDeleteSo versatile and a great idea Monika x
ReplyDeleteThese look like a great idea! Beautiful examples to show their versatility.
ReplyDeleteFabulous cards with these clever templates.
ReplyDeletehuge congratulations, Monika!!!
ReplyDeleteCongrats these look so versatile!
ReplyDelete