

Hello there STAMP friends! I'm back with Part 2 of a Spotlight project for you today and it's a messy one. Did you see my last tutorial about Spin Art? Have you tried it?
A couple months ago an artist I like, Alisa Burke, posted this where she and her kid used a salad spinner to decorate little gift boxes. That stuck in the back of my mind and when I saw a salad spinner at my dollar store I decided to buy it to try out the technique.
Fun. And messy. And unique. There's no way to know what you're going to get. And no way to recreate it exactly if you get something you really like!
Here's a card I made using one of the backgrounds I made in my salad spinner.

STEP 1
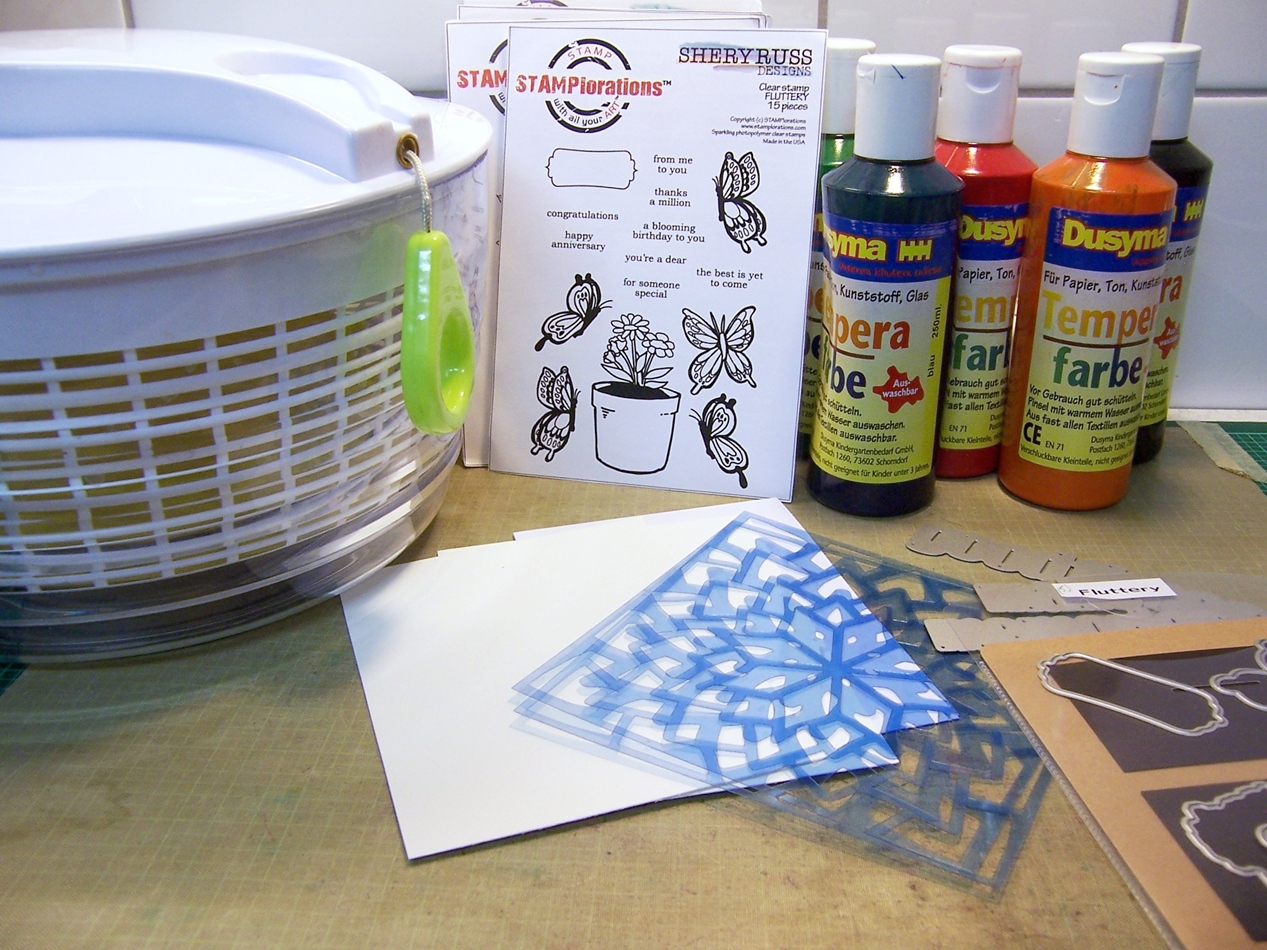
Gather supplies - salad spinner, thin paints (I used some ancient tempura paints plus some neon pink acrylic paint), cardstock (I used both watercolor and 100gsm smooth cardstock), stamps, stencils and dies to turn the backgrounds into cards.

STEP 2

STEP 3
So, spin art. Basically, it's using centrifugal force of a salad spinner to distribute paint on a piece of cardstock. Basically, you lay a piece of cardstock in the bottom of the strainer, spritz it with water, drop on some blobs of paint, close and spin it. Here's my first-ever video (!) to try to explain it better than with words...
BTW, that yellow in the bottom of the strainer is a platform I made (cardboard circle covered with plastic) to support the cardstock.
BTW, that yellow in the bottom of the strainer is a platform I made (cardboard circle covered with plastic) to support the cardstock.
These are the pieces I created with the spin art technique... Cool, eh?

STEP 3
This is the fun part. Look at your creations and see what you "see". Then make a card.
This isn't always super easy. Today's cards used the pieces third from the left in the top and bottom rows. In the blue one I saw a galaxy-ish BG. And in the red one I saw three red roses. Trust me.
STEP 4
This isn't always super easy. Today's cards used the pieces third from the left in the top and bottom rows. In the blue one I saw a galaxy-ish BG. And in the red one I saw three red roses. Trust me.
STEP 4
So once again, I couldn't bear to cover up too much of that blue galaxy, especially the neon pink. So I opted for some camouflage die cutting. I chose a couple phrase dies and went with the longer one. Thought "good times" was fitting for the funky BG.

BTW, see that green in there? That's actually from some leftover black paint in the strainer. Guess my black has lots of green pigment in it. Which is apparent if you look at the galaxy BG in the lower left corner of the photo up top. It was created with only black and white paints!
This piece was made with blue, white and neon pink paints and lots of water.
STEP 5
After die cutting the phrase from the panel I also die cut it from white craft foam. Leaving the letters in the foam, I glued on the die cut letters. Adhered the panel to a cardbase and then the individual letters to the panel. Last step was to glue in the little centers of the "g", "o" and "d".


I mentioned I saw three red roses. So I accentuated them with the Old Rose Mini Stencil and Barn Door ink.


BTW, see that green in there? That's actually from some leftover black paint in the strainer. Guess my black has lots of green pigment in it. Which is apparent if you look at the galaxy BG in the lower left corner of the photo up top. It was created with only black and white paints!
This piece was made with blue, white and neon pink paints and lots of water.
STEP 5
After die cutting the phrase from the panel I also die cut it from white craft foam. Leaving the letters in the foam, I glued on the die cut letters. Adhered the panel to a cardbase and then the individual letters to the panel. Last step was to glue in the little centers of the "g", "o" and "d".


STEP 6
This orange/red/white panel was basically a hot mess. I had used the lightweight cardstock (it has a very smooth surface so I wanted to see how the paints spread on it). When it was really wet and spun it folded in on itself in the spinner. Thus the hot mess. But you know me, nothing goes to waste.I mentioned I saw three red roses. So I accentuated them with the Old Rose Mini Stencil and Barn Door ink.


Then I added two butterflies from Fluttery heat embossed onto vellum as well as a sentiment and three flat sequins.

Did you find my spin art projects interesting? Keep your eyes open for a cheap salad spinner to add to your craft room supplies if you did ;)
And should you find yourself placing an order at the STAMP store soon, I'd love it if you used my STAMPGIRLMARIA code for an additional 20% off your order!
Good Times Phrase Die, Fluttery


Such a cool technique with awesome outcome! Looks like fun!
ReplyDeleteGreat looking background paper and such a cool technique.....tfs
ReplyDeleteSo clever, so lovely. tfs
ReplyDeleteThis is so cool!
ReplyDeleteWhat a cool technique!
ReplyDeleteWhat fabulous results!! love this technique
ReplyDeleteStay safe
Blessings
Maxine
so nice card!
ReplyDeleteWhat a very cool technique! If my salad spinner still actually spun, I'd definitely try this! :D
ReplyDeleteVery nice. Thanks for sharing.
ReplyDeleteHow fabulous!! I definitely want to go buy a salad spinner now!! These are so fun and look amazing!
ReplyDeleteBeautiful cards and fabulous design.
ReplyDeleteCOOL technique and FABULOUS cards!
ReplyDeleteWhat a clever technique and thanks so much for sharing your amazing artwork!!! So fun too!!
ReplyDelete