

Hi, it's Tiffany, and I'm excited to share another mixed media tutorial with you. This is a page done in my sketchbook/art journal using the fabulous stencils from STAMPlorations, gelli plate, old book pages (you could also use scrap paper), and acrylic paint.
I started by using my brayer to add a thin coat of black paint onto my 8 x 10 gelli plate. Then I place the Alpha Cascade stencil on the paint covered plate. (**remember, when using letter or number stencils on a gelli plate, place them on in reverse, so they will print legibly).

Then, I used an old book page to pull up the paint that is exposed through the stencil (you could use any scrap paper you have on hand for this, but old book pages are fun because they add the extra texture from the words that peek through your print). Simply place your paper over the stenciled part of the plate and rub with your hand or roll over with your brayer. This removes the paint for purposes of our print and also gives us a page that we can use later for collage paper.


When the stencil is lifted, it just leaves the impression of the letters on the gelli plate in black. On the other side of the gelli plate, I originally intended to repeat the same process, but last minute decided to do the other side in reverse. So, I wiped the black paint off the untouched side of the plate, then placed the Alpha Cascade stencil down and brayered black paint on top. Then, removed the stencil to expose the image with a black background and plate exposed where the letters of the stencil were placed.


I pulled out 3 colors of acrylic paint (quin violet, cad yellow, & ultramarine blue) to use on the next layer (which will print as the background behind the black letter prints as gel prints are always reversed). Once the black paint was dry, I placed the Rubber Bands stencil on the plate and used a small brayer to brayer on my 3 colors, continuing to move my stencil around the plate and add color until the plate was covered with a colorful background.


The first pic below shows the plate after the stencil was removed. After removing the stencil, I firmly placed it on my book page collage paper as well to remove any wet paint and add color to the collage paper. Then I carefully held up the plate and looked at the reverse side for a preview of what I would get when printing. (My plate is on a hard sheet of acrylic which makes it easier to do this, if your plate is on a flexible backing or no backing, be extra careful when lifting up). This gives you the chance to fill in or add any color/paint to spots that may need it before pulling your final print.


Once this layer of paint is dry, use a brayer to add a thin coat of white paint to cover the plate. Quickly, while the white paint is still wet, place your journal or sketchbook page on top of the paint covered plate and rub over the back of the page with your hand &/or roll over it with a brayer. Leave the page on the plate until the white paint has a chance to dry- you will have a more successful print pulling up the dry layers with a little added patience in this step.


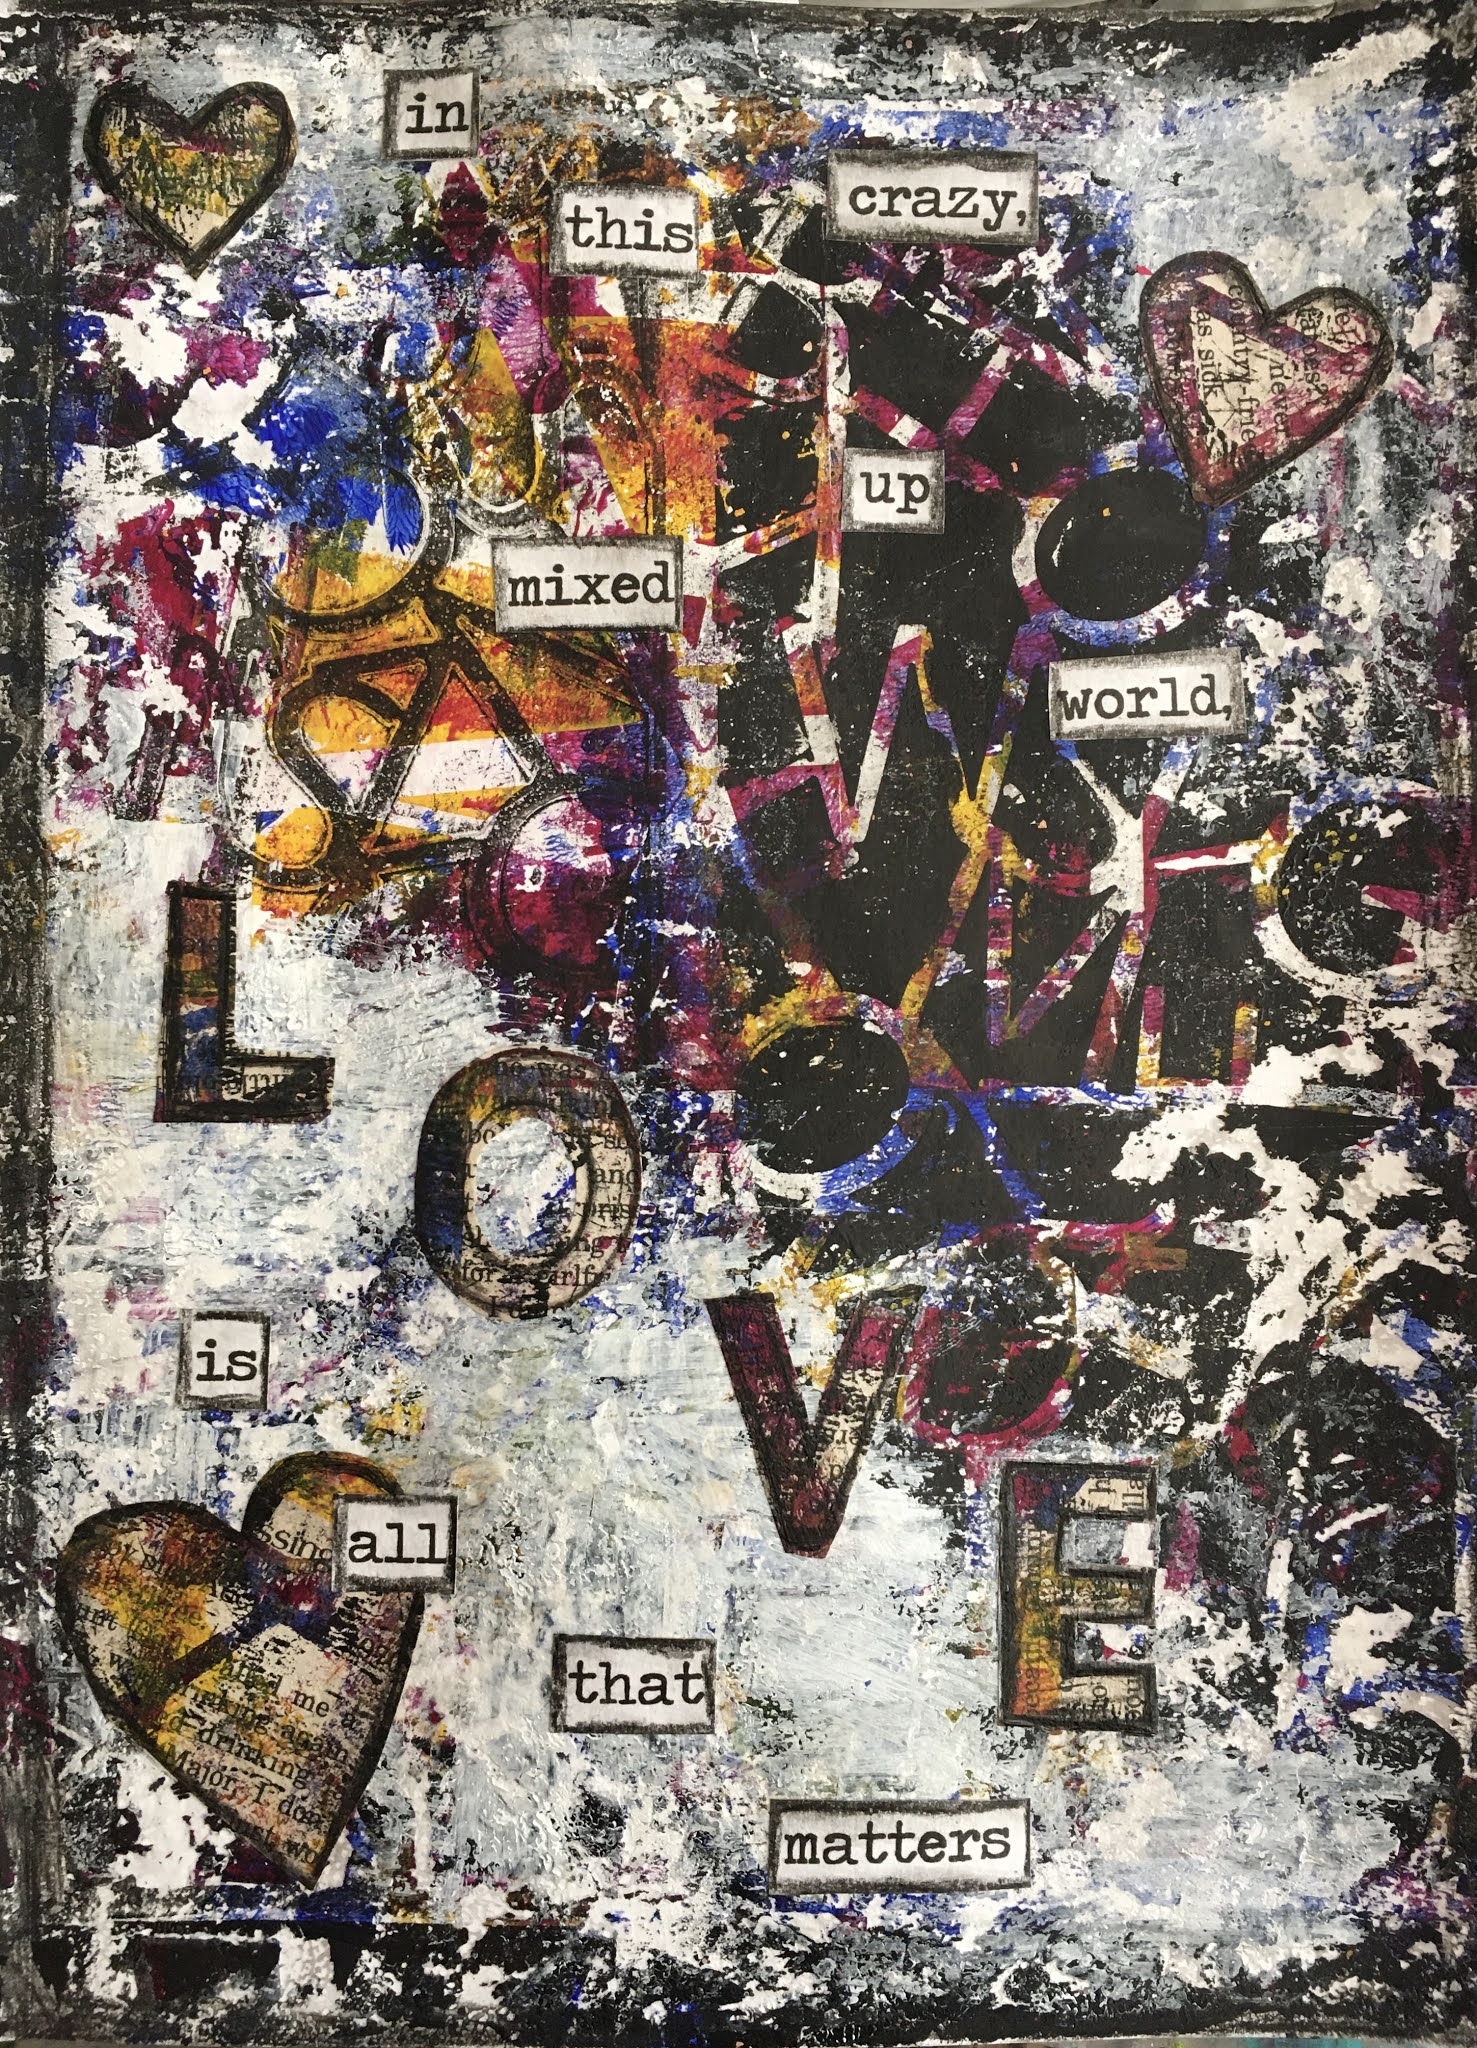
While waiting for it to dry, I used the Alpha Cascade stencil and traced the letters for "LOVE" onto the book page collage paper using a charcoal pencil and then cut them out along with a few hearts. I also printed off some words to use to make the quote "In this crazy, mixed up world, LOVE is all that matters". I used a typewriter font in Word, but you could also use a typewriter, stamps, stickers, etc for the wordfetti...


Once dry, I gently lifted up the journal page (You can peek before you pull the whole thing and if not pulling everything, put it back and wait a bit longer ;) ) After looking at the printed page, and playing with the placement of my collage pieces, I decided to add some white gesso (you could also use thinned white paint) with a palette knife to knock back some of the color and create more contrast and added texture. I edged the wordfetti pieces & hearts with a black charcoal pencil around the edges and used matte medium to adhere all the collage pieces and seal them on top.


For the final touch, I used a charcoal pencil and went around the edges of the page to make a smudged black border. Here is the final page:

Thank you for joining me for this mixed media turorial. I hope it inspires you to get out your stencils, paints, papers, etc., get messy, and create something.
See you next month!!!
-Tiffany Johnson
How fun! Love your mixed Media!
ReplyDeletethanks!
DeleteGorgeous Mixed Media!!
ReplyDeletethanks!
DeleteThis looks like loads of fun to do!
ReplyDeleteso fun!
DeleteLove all the grungy yumminess!! Very creative.
ReplyDeletethanks- it was fun
DeleteWow, so cool!! Love the message.
ReplyDeletethank you!
DeleteAbsolutely gorgeous. Love how that stencil looks. you have inspired me.
ReplyDelete:)
DeleteCool mixed media techniques!
ReplyDeleteVery artistic! Love your work here! TFS
ReplyDeleteThanks for showing all the steps in making this great mixed media piece.
ReplyDeleteyou're welcome!
DeleteVery creative and I like the sentiment.
ReplyDeletethank you
DeleteIt looks like graffiti on paper. I approve :) You put it together so well...
ReplyDeleteglad you liked it!
DeleteLove this mixed media work
ReplyDeletethanks
DeleteWhat an awesome page!
ReplyDeletethank you
DeleteFabulous mixed media page!
ReplyDeletethanks
Deletestunning!
ReplyDeletethank you
DeleteI like mixed media shares. Great project.
ReplyDeletethanks
Deletewow so many ideas to try out - thanks for sharing
ReplyDeletehope you have fun with it!
Delete