

And here is a close up to show you some of those yummy details:


And here we go!
Step 1: Apply random paper scraps in a neutral color using a fluid medium.
For this project I used scraps of pages from my cherished 1902 dictionary - an amazing $5 purchase from an antique store in Airdrie, Alberta. The paper in these older dictionaries has a beautiful color and does not dissolve when it gets wet.

Step 2: Apply paint through a stencil using a sponge applicator.
I love using makeup sponges as paint applicators for my stencil projects because I get a clean, crisp image and I can make a little bit of paint go a long way. Just dab your sponge into a pool of paint and dab off the excess on a scrap of paper (or a clean art journal page) then gently dab straight up and down overtop of your stencil.

For this project I chose the ARTplorations Retro Circles stencil, which I taped down so it wouldn't move (painter's masking tape is great for this because it comes off the page so easily.) Designer Tip #1: Using only one stencil but lots of different colors will give your piece great energy without being too busy.

I chose to use Tim Holtz Distress Paints because they are sheer enough that my words still show through the paint and I like how quick they dry. Designer Tip #2: Choose either a warm or a cool color pallet so that all the colors will blend beautifully when they overlap.

Next, using the same stencil, I added some white chalk paint to break up the colors a bit...

At this point I am totally trusting in the process because this is not the page I had envisioned when I started... Gulp!

Step 3: Using a Mask and paint or gesso cover it all up.

Now for the fun part... I chose Shower of Flutters for this next bit. This is a Mask rather than a Stencil ,the difference being with a mask I will see my background whereas with a stencil I cover it up. Black gesso is my preferred medium for this step because it covers everything in one coat and it is so beautifully matte that it accepts any other medium overtop.

First I applied the black gesso, moving my mask around, turning it over and using its edges and corners until I had my general layout...
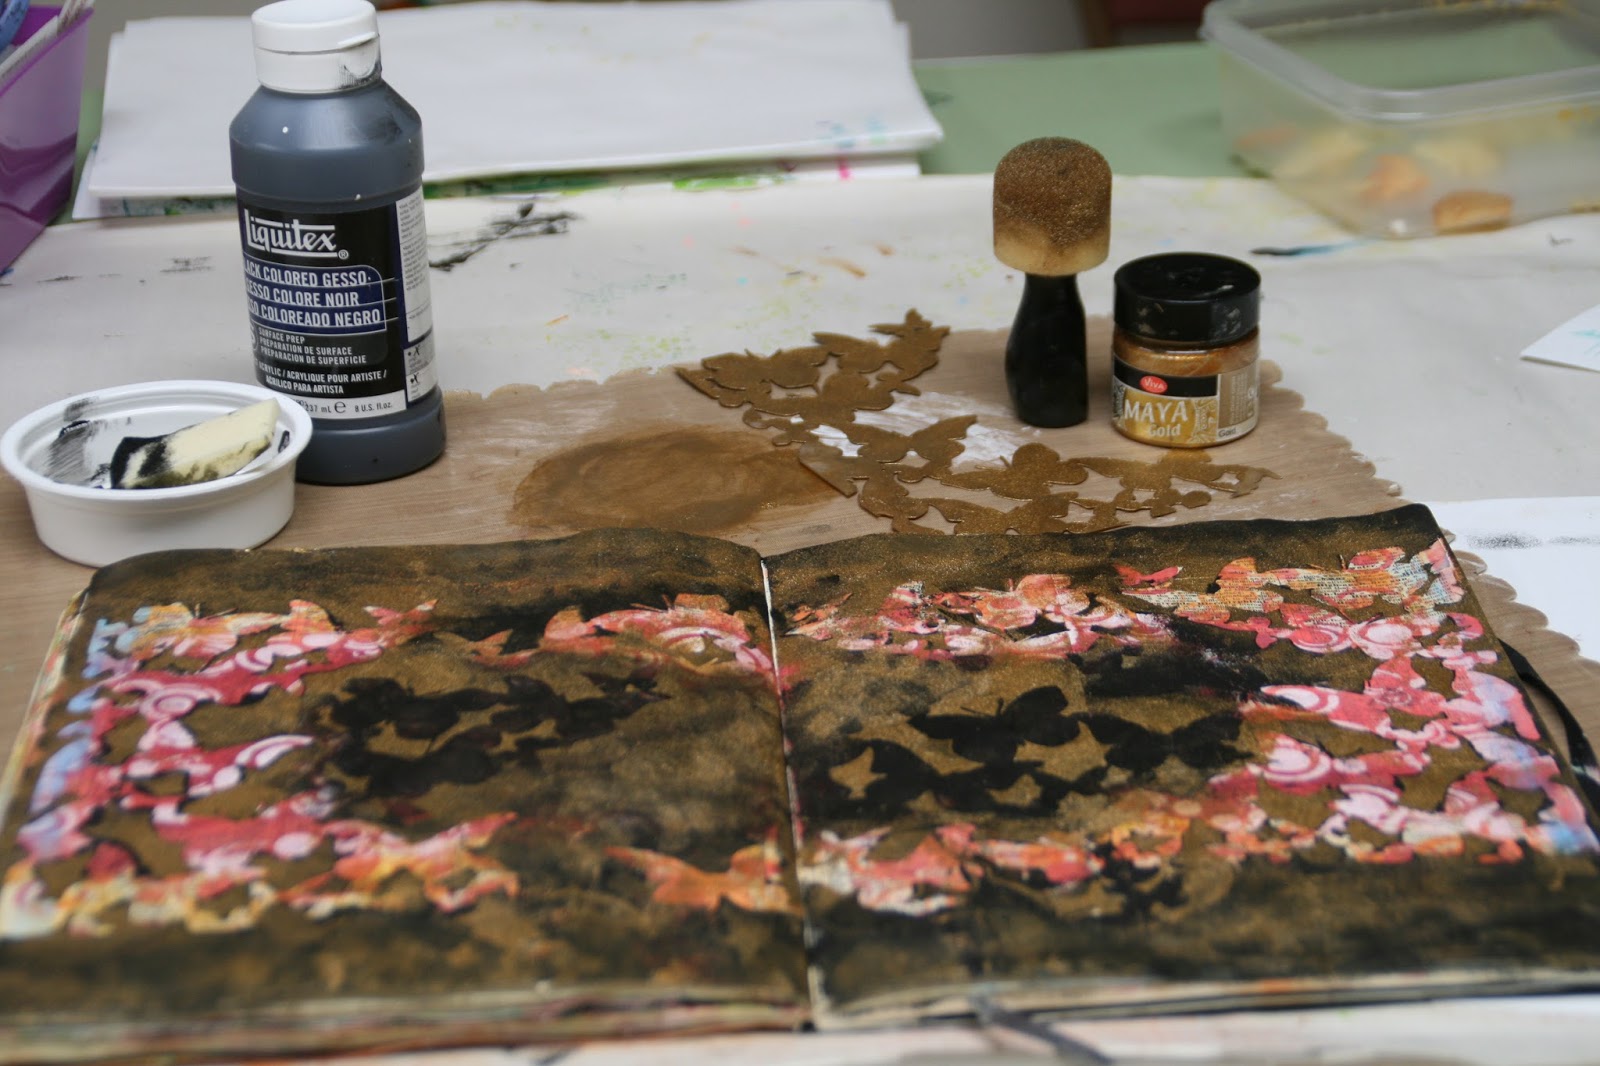
Then I cleaned the black gesso off my mask and repeated the process using my Maya Gold paint by Viva - this paint covers beautifully and has a wonderful shimmer.

Here is a close up of the details.

When I was done I realized I had added just a little too much gold (I do love my shimmer) and here was another place where I thought ... YUCK! But if you read my First Mixed Media Tutorial you may remember me saying: "Mixed Media is all about adding and taking away and adding back in again."

So I just covered up all that extra gold with more black gesso until it looked like THIS... LOVE IT!

I did pull out my black waterproof ink pen and re-outline my butterflies to make them really pop... Designer Tip #3 Using Waterproof Ink is important in mixed media because you don't want your marks to run all over your page if you add more layers.


And now onto choosing an empowering and uplifting sentiment to add to this spread because this IS my Art Journal after all - Smile.
I chose the Fearless large stencil and I used painter's masking tape to mask off the areas of the stencil I wasn't using. I decided to use my Ferro Gold paste by Viva; it contains a very fine sand and works especially well on stencils with words.

And that's it - a wonderful spread, rich with color and patterns that looks NOTHING like the steps along the way! Shower of Flutters worked so beautifully for this technique that my art brain is already full of ideas for a canvas... Happy Sigh.


So to recap, you can go from THIS:

TO THIS:

To THIS

In these four simple steps:
1. Apply a layer of paper in a neutral color that contain words or marks or patterns.
2. Apply a layer of colors through a stencil using colors from the warm or cool color family.
3. Lay a mask or an image overtop of your background and use a solid color paint or gesso to paint overtop of it.
4. Add a sentiment and embellish and add pen details until you are finished.

Thank you for taking my tutorial with me today, I hope it inspires you to try out some mixed media... and if it does, please do link up to our STAMPlorations Mixed Media Challenge this month... Anything goes except a card and I would LOVE to see what you create!
Lynne
STAMPlorations products used on this project:


This is an amazing result! Thank you so much for the tutorial
ReplyDeleteThanks so much Glennis... I would love to see what you make If this inspired you! 🤗
DeleteI'm one of those who tend to give up... But you are so right, it all worked out in the end and the result is beautiful!
ReplyDeleteFabulous
ReplyDeleteGorgeous Lynne. Love the brights against the black. Hugz
ReplyDeleteWow!
ReplyDelete