


I made this card a while ago and thought I'd make one similar to it for a spotlight post. Well, things went down a bit of a different road. Wanna see? And I have a couple tips for you too.
Here's my card.

Gathered my supplies - a black CS panel, Sketched Birthday Cake and Blossom Overture, Hugs die and embossing powders.

STEP 2
First detour from the original card... decided on a landscape orientation. Laid out my design then die cut the panel. TIP: Use washi to keep your die in place.

STEP 3

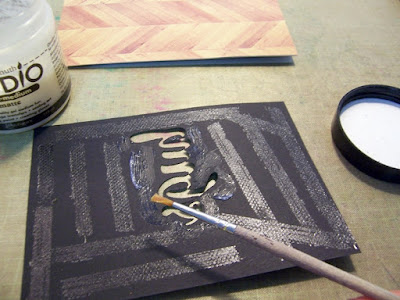
STEP 2
First detour from the original card... decided on a landscape orientation. Laid out my design then die cut the panel. TIP: Use washi to keep your die in place.

STEP 3
TIP: Picked up both stamps on my acrylic block with a grid, lining the grid line up along the lower edge of the panel. Inked with Versamark and stamped.

STEP 4
Carefully applied white, then copper embossing powders, putting excess back into jar each time.

STEP 5
Heat embossed. TIP: I have a piece of cardboard covered with aluminum foil that I use when heat embossing. Heat the gun up pointing it at the foil while holding the panel tilted over it. The trapped warmth helps to make the powder get a little sticky so that when you aim the gun from the top it doesn't blow away. I also let the embossed panel lay on the metal to cool down. Seems to reduce warping. (I think I got this idea from Ardyth!)

STEP 6
At this point the detour turned into a whole new destination. On the original card I'd focused on the negative, backing the black panel with a lighter gray cardbase to show through. This time I suddenly remembered I have glitter CS in copper that would look cool with the copper embossing. Adios negative. Hola stacked positive!

STEP 7
So although on this card it wasn't going to show through any negative, I chose a lighter PP and adhered it to my cardbase. TIP: If you use double sided adhesive, don't remove all the backing. Fold it down only halfway. That way there's less "sticky stuff" to accidentally grab the panel you're trying to adhere while you're lining it up. When the top is good to go, pull the folded backing paper off and press the bottom half down.

STEP 8
So I still had to adhere the die cut panel. TIP: It's easier to use a brush and matte medium around the edges of the die cut area. I used tape runner on the non-critical area.

STEP 9
TIP: Since they are always nearby, I use stacked acrylic blocks to press freshly adhered items for a couple minutes.

Here's another shot of the finished card. Found a few copper star sequins to embellish with too. All the sparkle is great although the layout doesn't really thrill me. If I did it again I would not tilt the black panel. Kinda looks like the "hugs" is doing a headstand and tipping over backwards!

Have I inspired you to heat emboss or do inlaid die cutting? Iif you try out any of the techniques from our Spotlight posts and hook your project up at our Spotlight Project Showcase you have a chance to win a $15 gift certificate (random drawing) OR your choice of 5x7 stamp set + a Spotlight Project guest designer spot (randomly drawn from the Top 3 picks).

Tschüss,
Maria
Love that fun cake and the 'hugs' die! Great copper and black combo!
ReplyDeleteWow! Really beautiful!!!
ReplyDeleteCool. Love the metallics against the black. Hugz
ReplyDelete