

Hello mixed media friends! I am super happy to be back this spring with another tutorial and share with you my way of creating simple background with just a few basic things. Some friends of mine were interested to know how I did my textural background with only paper scraps, gesso and colors so here's one I will show the process step by step.


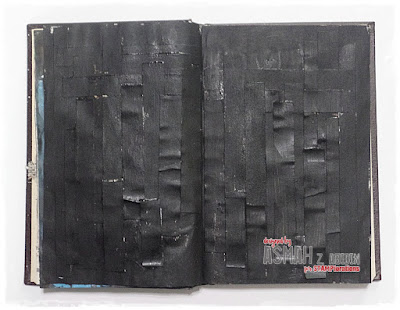
First and foremost I must say what sort of papers they are, the price comes with money. Make full use of them if you can. I have a box full of paper scraps from previous paper craft projects that I keep and use for background all the time. To begin with, I randomly cut the strips into different lengths and glue down on the pages using pva glue.

At this point, I felt I have covered the pages up to my heart content. Imagine the strips are like pieces of wood arranged to make a deck or something so this foundation should be stable I believe.

I used black gesso for this project. If you don't have it, you can blend in black paint with white gesso. You can also use white gesso and play with any choice of colors you wish. In this case, I prefer mine black to contrast with the whites in the center.

Once the black gesso is completely dried, I began to paint the pages lightly with red then blue. At this point I wasn't sure what I was doing {chuckle} but as always, it's my intuitive painting and expressive of emotion at the time of doing it.

I chose this color combination to build up rustic look. I was hoping it would turn out the way I wanted so overall it took layers and layers of coloring until I stop.

Here's the part how I make it rustic even more and probably an effort to achieve antique look. I tear of a strip of newspaper and press over the wet paint then I pull it away gradually leaving bits of newspaper tear on the wet paint. I keep on doing this same process while the paint is still wet.

Another way of achieving texture is by tearing off the paper strips with finger while they are still damp. The area where I find bulky is just nice to scrap off gently with finger and don't worry you will not create a hole in the page because you have created a stable foundation from beginning. I also glued about three to four pages together to set up a spread of page in this art journal book. By doing so, they become quite sturdy.

I was happy with the result so I proceed to add brown color next.

Nevertheless I must tell you that I sometimes continue to add more colors after my brain told me to stop. Unpredictable me where artwork is concern {smile}.

Finally I decided it's time to play with stencils. I used two ARTplorations stencils: Crisscrossed and Circular Two to create patterns.

That's how the journal looks so far and from here, I will continue adding colors.

Eventually I stamped one butterfly on drawing paper, fussy cut and color it up with watercolor pencils. Then I glue it down in the center page. My main highlight is the butterfly thus I end up coloring white color surrounding the flying creature.

I usually use typewritten quote in my art journal but this time I decided to write down with white gel pen and stamped the white space using Framed Oriole for its script.

So there you have it the entire process shown for today and hopefully you find my art journal inspiring and should you use wings in your mixed media projects this month, do join May Mixed Media Things With Wings Challenge.

That's it. I look forward to see you real soon and really hope you will try out my tutorial.

STAMPlorations and ARTplorations products I used:


Happy creating and have a good day.
Hugs and smiles,

Your amazing background has my heart. This is a wonderful project!
ReplyDeleteThank you so much Kirsty. Hugs xx
DeleteWow - so many layers and so much texture and colour - amazing
ReplyDeleteBlessings
Maxine
Thank you Maxine. I truly appreciate :) Hugs xx
Deleteone woord- amazing!
ReplyDeletelove it!