

Howdy STAMP friends! Hope 2021 has started off well for you. I have a project for you today that's going to take you, not kidding, hours. BUT... it's a super fun way to spend a couple hours. Plus you can use up some of your paper scraps! Meet my flower bouquet.

STEP 1
Gather supplies - Cardstock, including scraps. Stamp set, Trendy Spring Blooms (plus dies) and cover plate dies. Square dies to create a frame. Recycled plastic packaging. Glue, glue dots and double sided tape. A bone folder, scoreboard if you have one and ruler.

STEP 2
Die cut loads of flowers from your scraps until you're able to make a full bouquet.


STEP 3
Stamp and fussy cut a few solid blooms to add to your bouquet.

STEP 4
Time to attach stems to the blooms. I cut strips (about 1/2") from plastic packaging, some flimsy, some pretty sturdy. I used double sided tape to adhere the solid blooms to the plastic. I used glue to adhere the delicate blooms.


STEP 5
Time to make the pop up box card to hold the flowers. Back story.... my MIL turned 85. Since we couldn't visit her, I suggested to DH that he order her flowers. But no. He's too "practical" for that ;) So off I went to my craft room to make her a bouquet (which I will share on my blog soon and which probably ended up being more expensive than ordering flowers!!!)
Having made MIL's, I decided to create another one for my Spotlight project today (using cardstock). I know I'm late to the party, but pop up box cards are a great way to create a scene with even more depth than on a card.
I followed this German video and here's my teamie Karola's Spotlight which give detailed instructions for making a pop up box card.
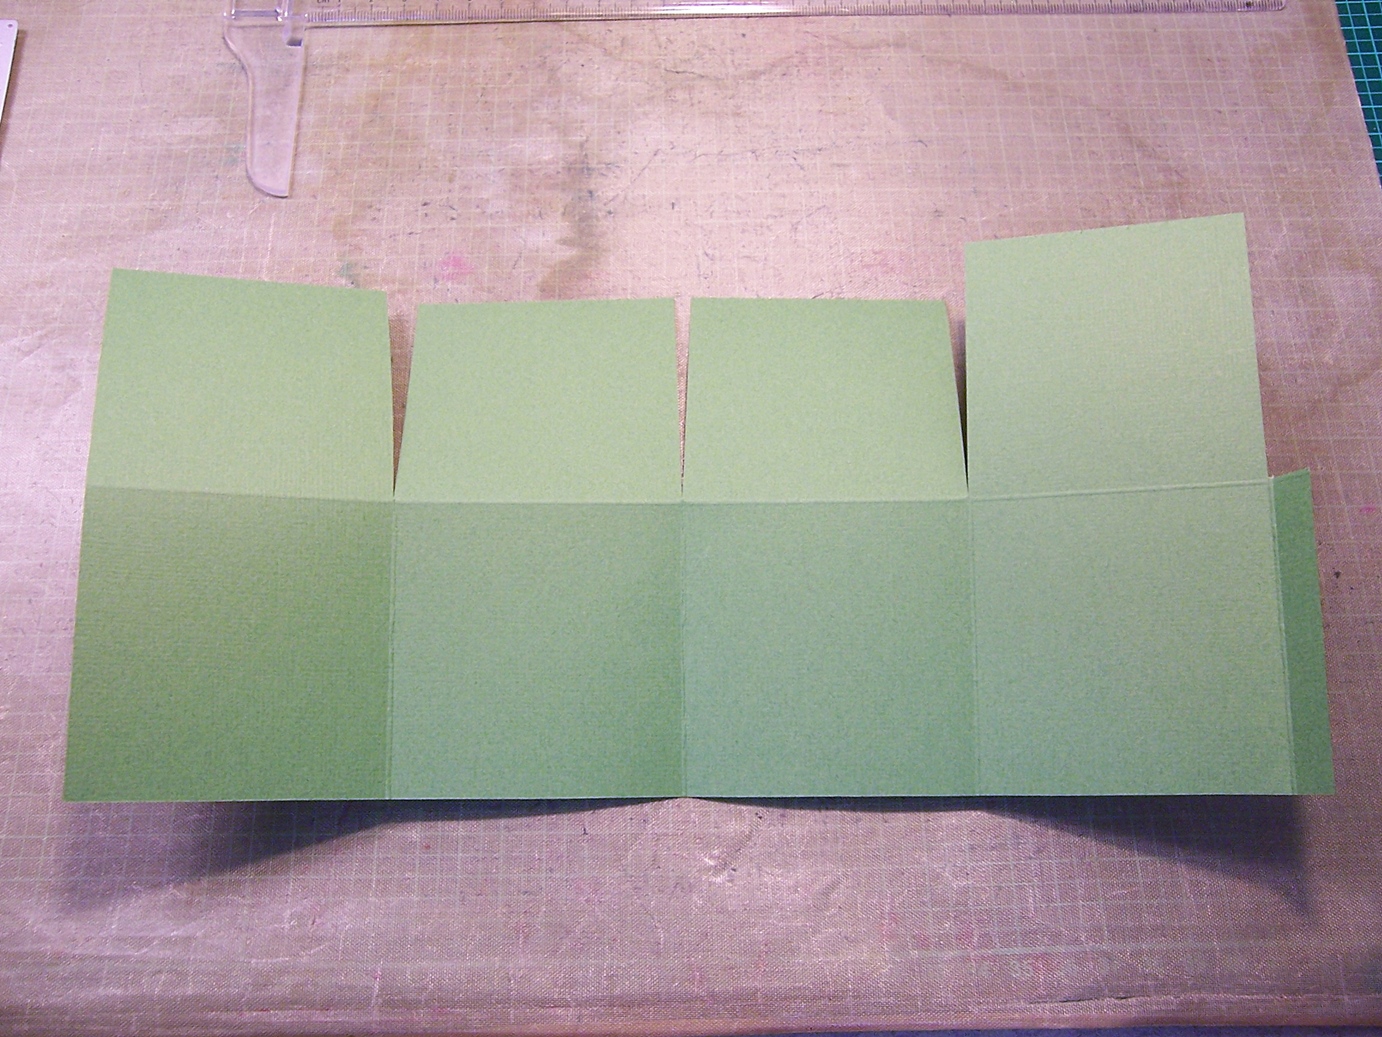
My cardstock measures 29 cm by 14 cm. This yields a box 7 x 7 x 7.
Score once horizontally in the middle and three times vertically. Trim the flaps and the little tab for gluing the box together.

STEP 6
I mentioned I made one of these for my MIL. Most people "decorate" the box with die cuts or squares of PP. That's a bit busy for my taste so for MIL's I used two-sided PP. For today's project I decided to add texture and interest, but keep the box tone-on-tone.
Die cut a couple panels from the same green CS using cover plate dies. Die cut squares to decorate the box flaps out of the interesting areas of the large die cut panel. Using two square dies taped together (see Step 1 photo), cut three frames.
Adhere squares and frames to flaps of box. I did not score/fold the back flap of the box, so I adhered a panel with a butterfly to that taller side of the box.


STEP 7
Make four strips (9cm by 2 cm), score tabs on the sides and adhere these 7cm inserts into the box (which has been glued together using the little side tab). You will attach your flower stems to these inserts. TIP: Adhere in middle to lower section of box or use same color CS for the inserts. I used a sturdy white CS but you see the inserts in the final product!


STEP 8
Fill the box! Use glue dots on the plastic strips to adhere them to the inserts. Pick them up right off the backing paper. I think my glue dots are 3/8". I tried to cut my plastic strips about this size too. TIP: When your fat fingers don't fit in between all the stems as you fill up your box, use tweezers to pinch the strips to the inserts ensuring the glue dot has a good grip.


Here are another couple close-ups of the detail of the finished card. I added some greenery at the front of my bouquet and on a few stems too. I also added a white panel on the back tall side where I can write a message.


It flattens down for mailing. It may fit in an envelope or you can "gift wrap" it (that's how I did my MIL's to include in the box we sent her.) If you keep your stems shorter, you can create a bouquet which fits within the flattened card.

Here it is - happiness in a box!

Well that was certainly a long one. If you stuck with me til the end I hope I may have inspired you to give a pop up box card a go. So. Many. Possibilities. Should you find yourself placing an order anytime soon, I'd love it if you used my STAMPGIRLMARIA code for an additional 20% off your order


Love this cheery box card! The flowers are so fun!
ReplyDeleteSo very fun!
ReplyDeleteSo fun. Love how you’ve decorated the flaps for a tone on tone look!
ReplyDeleteMarianne x
Great project and very helpful tutorial. tfs-stay well.
ReplyDeletePerfect for spring! I LOVE the colors!
ReplyDeleteWonderful idea for the box. I like the use of the cover dies for the panels.
ReplyDeleteSuch a lovely idea for the elderly-a beautiful bouquet with no extra care or mess! Love that you used scraps!
ReplyDeleteLove it! Thanks for the inspiration. :D
ReplyDeleteThis is so fun, pretty and colorful!
ReplyDeleteWow! I love your colorful flower explosion box! Gorgeous!
ReplyDeleteFabulous build
ReplyDeleteand love how you
used the dies for
the side panels.
Carla from Utah
Fabulous box card blooming with beautiful flowers in fresh bright colours. Great details.
ReplyDeleteVery cool project! I always love these pop-up boxes, and they are always a hit with the recipients!
ReplyDeleteAbsolutely beautiful! Love all the colors and the text on the flowers. So pretty!
ReplyDeleteOh wow!!! This bouquet is really gorgeous!!! Thanks for the great tutorial and for the inspiration!!!
ReplyDeleteWow this so pretty...love the great burst of blooms. BTW my hubby is just like yours about flowers. Ha!
ReplyDeleteWhat a super pretty box card it's amazing how you made it I might need to give this a try soon
ReplyDeleteYou rocked this girl!!
ReplyDeleteVery creative! WOW so beautiful TFS
ReplyDeleteBeautiful! I never thought to die cut part of a cover die cut.
ReplyDelete