

Howdy friends! If you've stopped by my blog recently, you've probably seen that I'm having some fun creating based on inspiration from fall/winter 2016 fashion. There's some pretty crazy stuff out there right now - not that I'd wear any of it - kind of Shakespeare goes Punk. It's inspired me to get
Here's today's card.

First let me show you the photo in the ASOS fall/winter catalog that caught my attention. I believe this is makeup. My brain saw embossing powder ;)


STEP 1
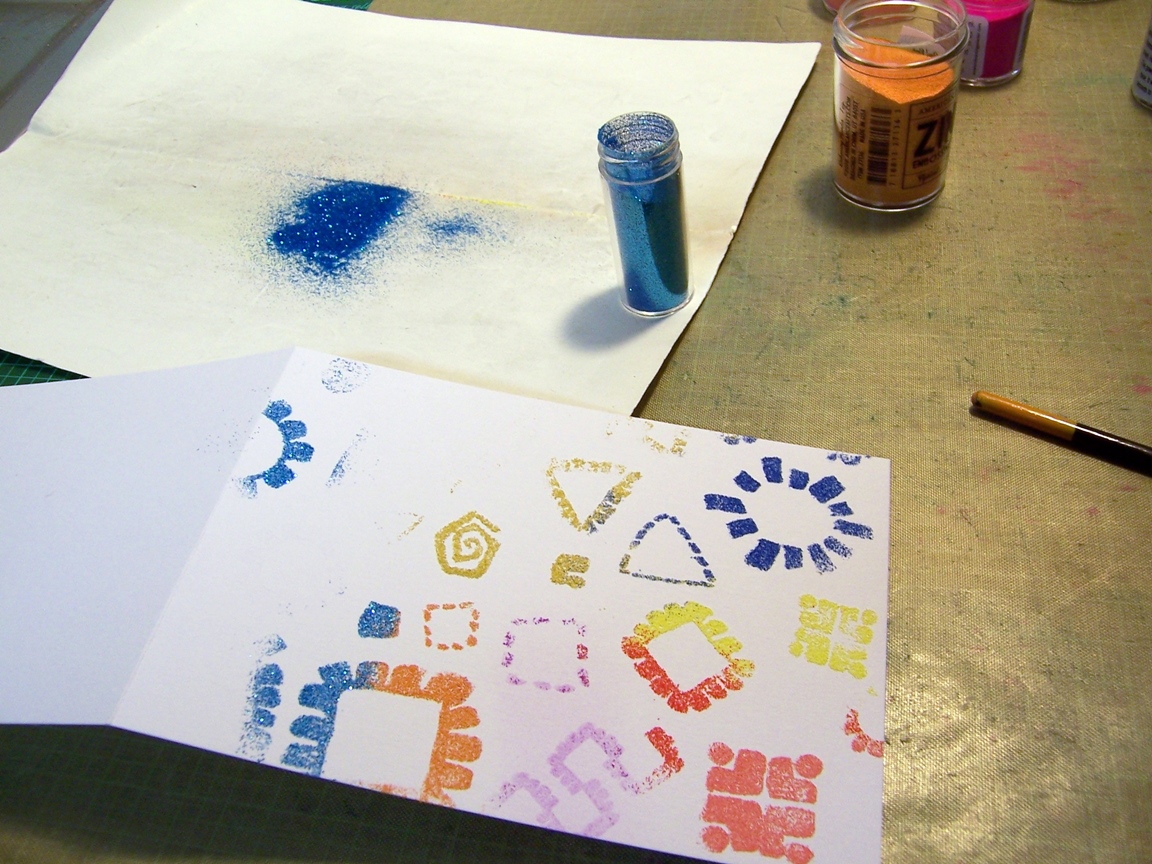
So I gathered my supplies - Artsy Tribal Doodles (nice solid areas to hold lots of color) and embossing powders to reflect the photo as best I could with my stash.

STEP 2
You've seen me do this before, use a stamp set "as is" to stamp a background. If you look below at the lower left corner and compare it to the cover sheet, you'll see that I rearranged a couple stamps to cover my card in a less "arranged" way. But the rest are "as is", I just tilted the sheet slightly.

STEP 3
With my inspiration photo on my phone in front of me I opened my powders and got my excess-powder-catching-sheet-of-paper ready to go. Inked the stamps on the acrylic sheet with Versamark and stamped right onto my cardbase.

STEP 4
Then roughly following the arrangement of colors in the photo, I sprinkled on embossing powders. Started with coral.

STEP 5
Then orange. You'll notice I've used all kinds of brands of powders. And purposely did not try to use just one color on one image. I wanted the "mixed" look. When the Versamark is covered with powder, if you add another color powder, the new color will not stick to the powder already there. It will only stick to open Versamark. So you can get a "mixed" look on one image.

STEP 6
Continued sprinkling on the powders, putting excess back into the jar each time. (Well, once I forgot but it was pink and purple so I put the powder back into the purple jar and called it good ;) This "the weirder, the better" style of creating is really liberating!!!

STEP 7
When the images were all covered with embossing powder, I melted with my heat gun. TIP: I warm the gun on the aluminum-covered cardboard, keeping my card above it to warm the powders from beneath. This warms them up a bit so that they stick and aren't as likely to blow off when I then heat from the top. On this card, since it took a bit longer than usual to get all the powders on, I didn't want to risk too much blow off so I heat set from beneath.


STEP 8
The results were pretty good, but there were a few spots where I thought I could get better coverage so I went in with the individual stamps and gave them another shot of Versamark and then more embossing powder. Heat set again.

STEP 9
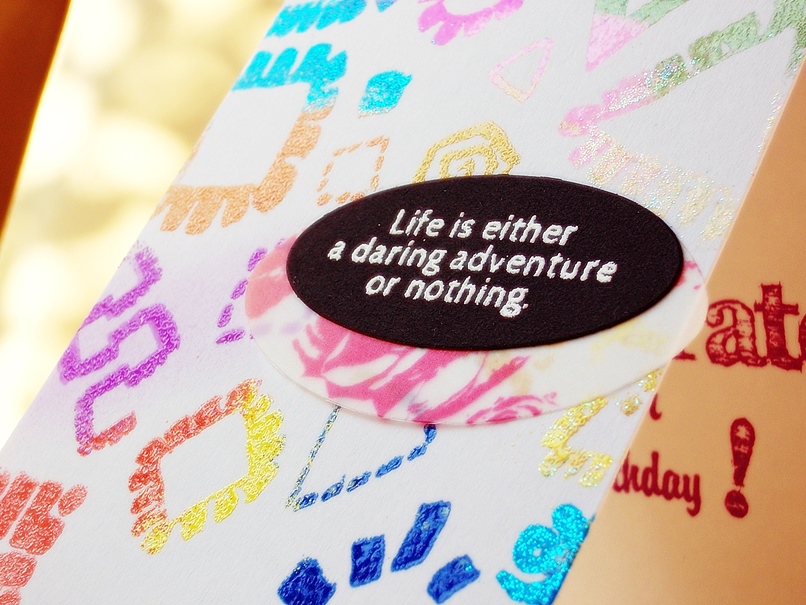
Keeping things funky, I chose this sentiment from Born to Roam and heat embossed it onto a black die cut oval. Die cut a larger oval from printed vellum that I thought had a funky/fashion vibe.

And here's the finished card.


A close up of some of the sparkly goodness thanks to the light yellow and turquoise embossing powders with glitter in them (and now all over my craft room too!)

Have I inspired you to heat emboss or be inspired by fashion when creating a card? If you try out any of the techniques from our Spotlight posts and hook your project up at our Spotlight Project Showcase you have a chance to win a $15 gift certificate (random drawing) OR your choice of 5x7 stamp set + a Spotlight Project guest designer spot (randomly drawn from the Top 3 picks)!

Tschüss,
Maria
Products Maria used in today's project:


Such an awesome card, Maria!
ReplyDeleteYou look like you had so much fun making this card. Fun and colourful, thank you for he inspiration x
ReplyDeleteCool. I really need some yellow embosssing powder. Must get me some more colours. Hugz
ReplyDeleteThis is a fun and funky card - love how you have used the powders - I must get mine back out.... you have inspired me
ReplyDeleteBlessings
Maxine
ooh fantastically colorful card. Love all the bright EP:)
ReplyDeleteFun look! I forget about all my colored powders and use mostly clear or gold, if I emboss at all! Will have to have a look though my powders and see what I have!
ReplyDeleteThis looks like so much fun. Need to do something with this technique. Awesome project.
ReplyDelete