Hello STAMP friends! I'm back today with with two more cards made with my masterboard I created with Flexi Templates. I hope you saw my last Spotlight where I created the masterboard and then made two cards with half of it. Today I'm sharing the other two cards.
STEP 1
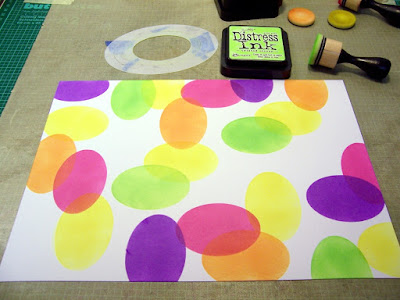
To recap... I inked a rainbow of distress inks through my mask made by taping together three Flexi Templates.
Five more reds (avoiding green).
And then even two blues (avoiding orange).
STEP 3
So. What to do with this lovely piece of cardstock? I cut it in half. On one half I stamped Art Marks and made two cards. (See my May Spotlight post.)
STEP 7
Then I adhered a cover plate die cut (I had this one in leftovers so I didn't use the birthday cake you might have noticed in my first photo) over the panel. I think the larger open spaces on these blooms work better with the ovals.
On the die cut "you" I added a gold heat embossed sentiment on black which I later replaced with one embossed on white ;)
I adhered the "you" over the white area where I'd cut it from the panel! Camouflage die cutting with a little twist! The inside reads "happy mail."
Hope I've inspired you to give the Flexi Templates a try, whether on a card or on a masterboard. If you should you find yourself placing an order anytime soon, I'd really appreciate if you used my STAMPGIRLMARIA code for an additional 20% off your order.


These master boards look like a great thing to do in an afternoon and have on stock for those card ideas when you're stuck for inspiration. Love the colors!
ReplyDeleteAwesome results!
ReplyDeleteI love the mixed media and bright colors!
ReplyDeleteI loved your first set of cards, and love these also - SOOOOOOO fun, Maria!!
ReplyDeleteWow! The colors on this make me wanna sing! Awesome cards! xoxo
ReplyDeleteThese are amazing, you are so talented!
ReplyDeleteFun to see step by step. They turned out great.
ReplyDeletewhat fabulous cards made from the colourful master board!!
ReplyDeleteStay safe
Blessings
Maxine
Very fun and colourful.
ReplyDeleteGreat show of the creation of layers. I like the relax card.
ReplyDeleteA few techniques I want to try
ReplyDeletegreat ideas!
ReplyDelete