
Happy Friday, STAMPlorations friends!
CUTplorations Creative Cuts puts the spotlight on the
thin metal dies we carry in the store. We have the awesome
Maureen Ruangchamneil returning as guest designer and you can be sure she'll blow us all away once again with her super creative projects in the next three months! Make sure you comment on this post for a chance at a $15 prize code. Every month, we draw 7 winners, with the winners randomly drawn from all posts published during the month. The more posts you comment on, the more chances you have.
Welcome to summer, STAMPloration fans! I'm so grateful to be back with all of you for the next few months. It's an exciting month for STAMPlorations - they are celebrating a birthday! In honor of this, my guest designer post is all about birthday craftiness. Even the country's having a birthday very soon! This post incorporates super fun CUTplorations dies so you can create some party items. I really liked working with the previously released dies in this birthday bundle - it's a great time to scoop up these items with the birthday promotion going on this month too. Happy birthday, STAMPlorations!
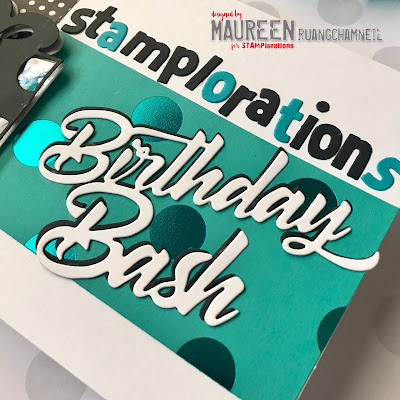
Project #1: Birthday Bash Shaker Invitation
Birthday Bash Phrase Die
Gift Builder #1
Lowercase Alphabet Plate Die
This card is an easy invitation to assemble and a unique way to add a shaker embellishment. I started with a 4.5" by 5.5" white card, and cut 2 strips of coordinating polka dot paper, one in turquoise and one in black and white. I glued these on as the base.
Next, I cut the Birthday Bash phrase in both black and white, and glued the white one on top, offset just a bit to the right. This gives it a drop shadow effect. From here, I cut the word "stamplorations' out of the Lowercase Alphabet die, gluing to the front, alternating black with some turquoise. It's a great way to personalize your invitations with the guest of honor's name!
Now for the shaker - I wanted to turn this Gift Builder #1 into a shaker but with thin edges, the foam tape would peek through. So, using a small, plastic jewelry baggie, I cut off the top, added in some confetti (tip: rub the inside of the bag with a dryer sheet to prevent static) and stapled it. Then, taking clear glue, I folded and glued in the corners and stapled it to the white gift base.
To give the confetti some room, I added pop dots to the top gift die cut and secured it over the confetti bag. A final touch was to add bling to the bow. I love this as a shaker alternative and it should go in a mailing envelope nicely because it's very flexible Now, let's party!
*****
Project #2: "Pop" Bottle Tag
I love a great party theme! This red, white and blue inspired pop bottle tag is perfect for 4th of July or any summer picnic celebration, and it adds a splash of color to your party table.
To start, I trimmed a piece of red and white striped wire ribbon, and formed a loop. I then cut a circle in blue card stock and stapled it to the middle of my loop. Trim the ribbon edges as needed.
From here, I cut Cupcake Builder #2 in a white shimmery paper with a blue cupcake liner to go over it. I wanted to model the same stripe in the ribbon so I cut a red and white topper from the cupcake dies then hand-trimmed the red one into stripes, gluing them over the white.
My final touch was to cut the word 'pop' from the Lowercase Alphabet die in the same shimmery white paper, and glue it on to the circle, along with a couple bits of confetti. This project should add some POP to your July 4th celebration!
*****
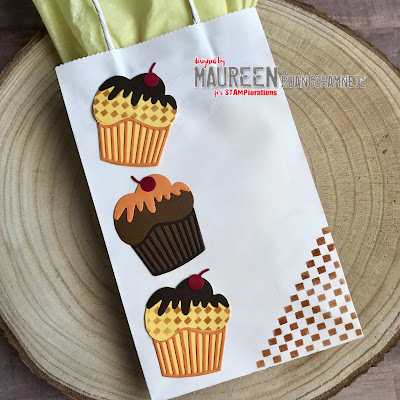
Project #3 - Sundae Cupcake Gift Bag
When I saw the Cupcake Builder #1 set, I immediately thought - how cute would it be to turn these into sundae cakes? Working with colors like orange, yellow and brown are not usually my first color choices, but they turned out SO adorable. I've cut 2 bases in a yellow and one in a light brown, then added a dark brown plus 2 orange cupcake liners.
From there, I took the cupcake top and cut it again in yellow but this time I took the checkered corner of the Patches ARTplorations Mini stencil and sponged it with Vintage Photo Distress Ink. Glue those to the cupcake tops. Taking the larger Patches stencil this time, I sponged the corner with the larger checkerboard pattern and gave the gift bag a lift with a small corner pattern. To keep the pattern going, I lifted the stencil once to fill in the entire corner.
My final touch was to take the small cherry die cut from the Cupcake Builder #2 set and the topping die from the #1 set and glue it to the tops, and then finally to the bag. The checkerboard print reminds me of a 1950's diner - I can't wait to give this delicious gift bag to someone!
Thanks for following along with my CUTplorations work today! I hope you find inspiration with one of these projects to create your own festive party items. See you next time!


Wow! These projects are all amazing TFS
ReplyDeleteLove the projects! Fun present and cupcakes!
ReplyDeleteGreat range of projects. Love the shaker card!
ReplyDeleteOh an remarkable set of unique and beautiful projects
ReplyDeleteStay safe
Blessings
Maxine
Such fun and creative projects!! Thank you!
ReplyDeleteFun projects - especially the shaker!
ReplyDeleteShakers are my fave type of card.
WOW!! These are so fun and full of color. Getting one of these cards for my birthday would be amazing!
ReplyDeleteLove the idea of using a little plastic bag for the shaker items instead of trying to make foam tape work around small shapes.
ReplyDeleteThose cupcakes are so cute, and this is such a clever way to use stencils. Thanks for the inspiration.
ReplyDeleteLove the different ideas that you have created. Thanks for showing a different way to use stencils.
ReplyDeleteTHANK YOU for sharing your Birthday Craftiness with us Maureen - I'm INSPIRED!
ReplyDeleteI like the invitation and added shaker.
ReplyDeleteLove that cute cupcake die
ReplyDeleteLove all these birthday themed projects!
ReplyDeleteamazing projects and thank you for all the tips about shaker cards, very useful!
ReplyDeleteSuper fun birthday projects! Great tip about the softener sheet to help prevent static in the shaker.
ReplyDelete