

In my last spotlight I walked you through my design process when following a sketch. Thought I'd do something similar in this post and walk you through how I created a card based on a color challenge blue and yellow. I'm not usually a real "blue" gal, but I think after Christmas this fresh combo came as a welcome change!
Meet today's card.


STEP 1
I had recently revisited my favorite cards of 2016 and made a mental note to use designs I liked best again in the future. No time like the present. The blue and yellow reminded me of this card which is one of my favorites.
The colors are from The Flower Challenge, BTW, so flowers were in order too. And some of the supplies from my last spotlight project were still out. So I thought I'd CASE myself,

STEP 2
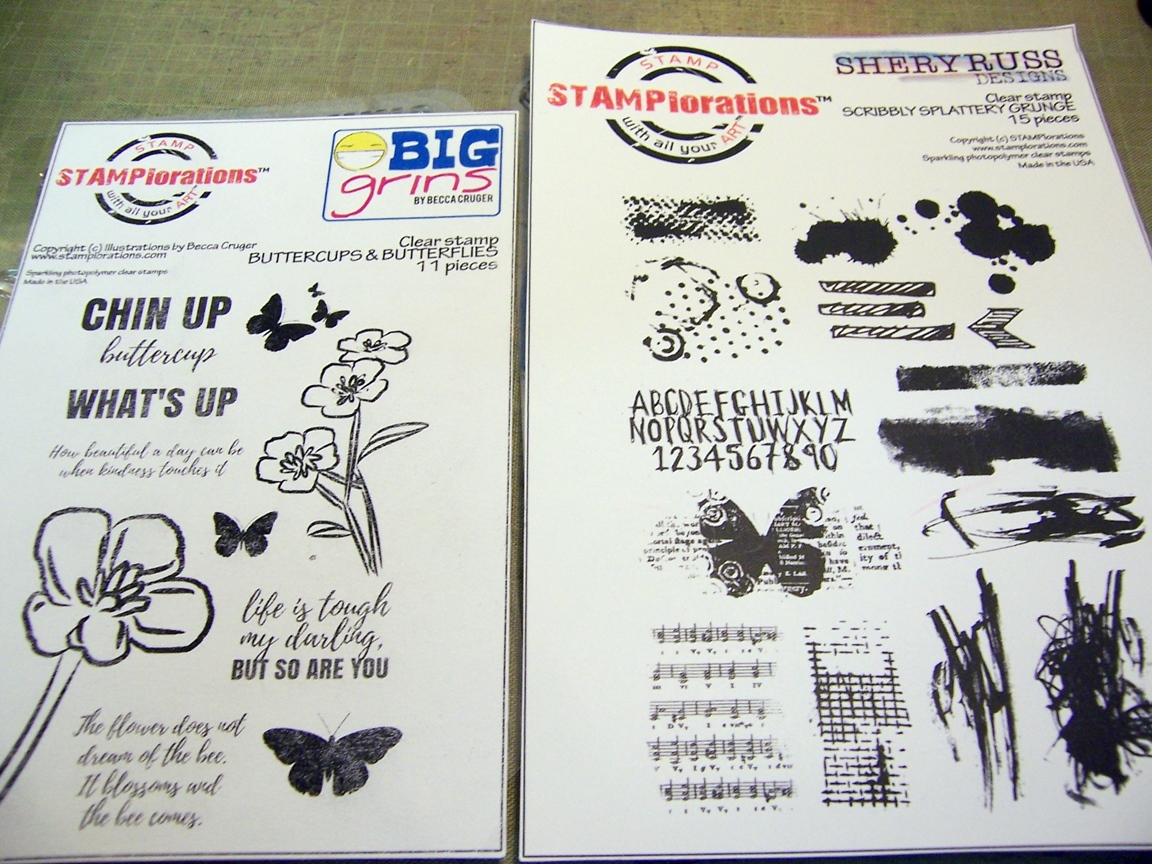
I chose the stamps I wanted to use, the flowers from Becca's Buttercups and Butterflies and Shery's Scribbly Splattery Grunge.

STEP 4
The colors are from The Flower Challenge, BTW, so flowers were in order too. And some of the supplies from my last spotlight project were still out. So I thought I'd CASE myself,

I chose the stamps I wanted to use, the flowers from Becca's Buttercups and Butterflies and Shery's Scribbly Splattery Grunge.
STEP 3
I opted to mask a rectangle on my cardbase and stamp it full to create a background for the images rather than inking it as I did in my 2016 card. Cut a mask from scrap paper with a rectangle die and temporarily adhered it to my cardbase.


To choose my ink colors I compared my ink swatches with my watercolor swatches and settled for Hero Arts Cornflower since the tone was similar to the light blue in the right and the dark blue in the left column I was going to use to watercolor my die cut blooms. TIP: When designing with two colors, it's more interesting to have one color more dominant than the other.


Now it was time to stamp the masked area. I put some ink down on my non-stick mat and spritzed it with water. I inked up the dotted stamp with this and stamped it all over through the mask.

Love the artsy look of this repeat-stamped area when I removed the mask. TIP: Be sure to stamp a lot around all the edges of the rectangle. If you don't you'll lose the contour when you remove the mask.

STEP 7

STEP 11


STEP 7
I chose to bring in the yellow in the form of blooms stamped directly onto the cardbase. I'd decided to use three die cut blooms placed around the edges, so added two spots of yellow to keep the number odd.

STEP 8

STEP 8
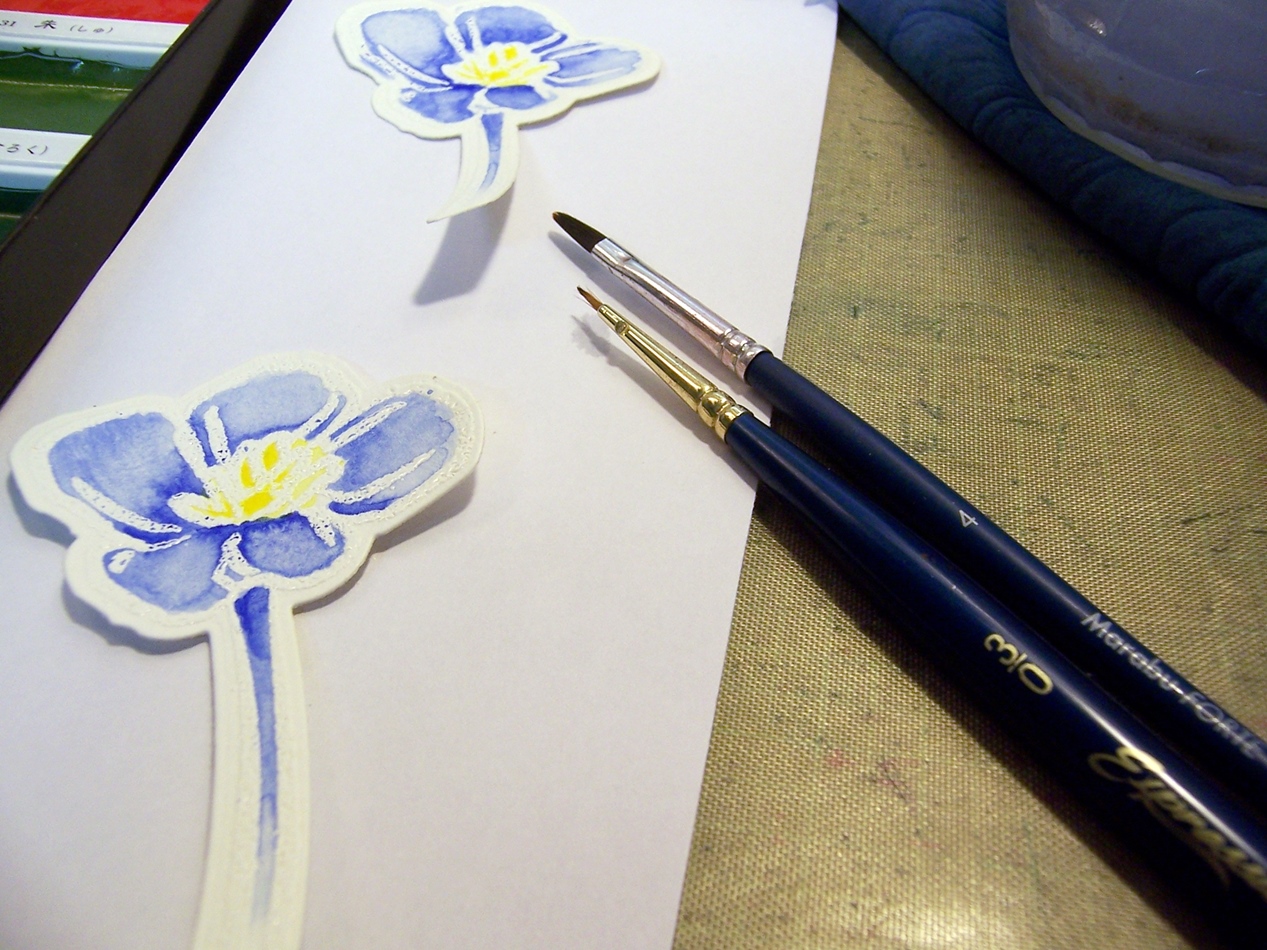
I die cut three blooms and heat embossed them white. TIP: Use temporary adhesive to adhere the die cuts to a piece of scrap paper. It keeps them in place when you want to stamp them and allows you to pick up the whole sheet instead of each little die cut when applying embossing powder.

STEP 9

STEP 9
I then set out to watercolor the blooms. TIP: Spritz the pans you plan to use to get them softened up rather than dipping into them with your brush. To bring in a tiny bit more yellow, I used my super skinny brush to paint the centers yellow. Used the #4 to paint the light and dark blues. Tried to add a bit more pigment around the center of the blooms.


STEP 10

STEP 10
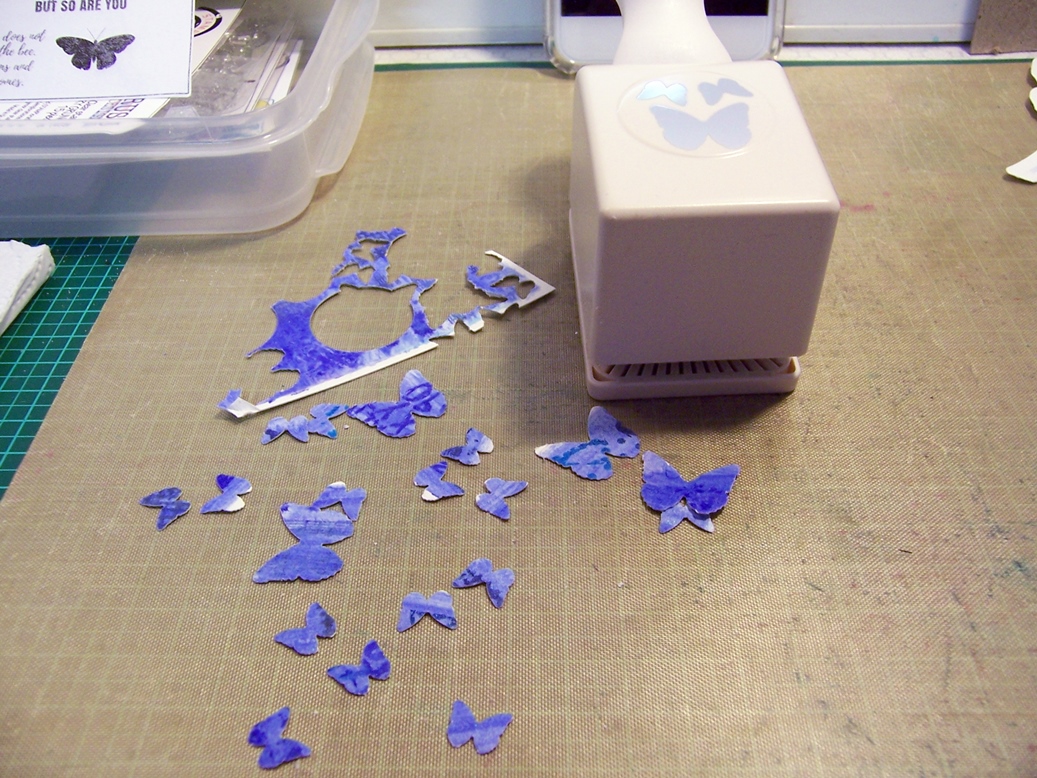
This blue watercolored panel was a leftover from my last spotlight card. Instead of tossing it, I punched some tiny butterflies.
STEP 11
Heat embossed a sentiment from Buttercups and Butterflies in yellow on my cardbase.

STEP 12

It was at this point that I decided that I didn't like the yellow sentiment. Too much yellow! And the wrong tone of yellow! Easily remedied this by heat embossing a sentiment onto a snippet of blue CS. Did some stamp surgery to get this sentiment from Big on Words Mom ;) And put a few butterflies on the card too to add some movement to the design! Hope I've inspired you today.

STEP 12
Adhered the watercolored blooms (only put glue in the centers so the edges would lift up from the card). TIP: Use acrylic blocks to weight down the adhered elements for a couple minutes while they dry.


If you try out any of the techniques from our Spotlight posts, hook your project up at our Spotlight Project Showcase.
Tschüss,
Maria
Products Maria used in today's project:


Beautiful!
ReplyDeletebeautiful card! love the colors!!
ReplyDeletelove the way you used watercolors, your card is gorgeous
ReplyDeletebeautiful!! love the colors :)
ReplyDeletecheers
preety
Gorgeous card - I love the colours and design, fabulous! xxx
ReplyDeleteFun to see your steps and read your tips Maria for creating your cheerful card. TFS Hugs..
ReplyDeleteBeautiful card.
ReplyDeleteLove the colours
ReplyDeleteBeautiful card! I love the colors you used and the pretty buttercup flowers!
ReplyDeleteLovely card! :)
ReplyDeleteGorgeous Maria, like a bit of sunshine on this cold and foggy winter's day!
ReplyDeleteWhat a beautiful card with the blue-yellow flowers, Maria. THANKS for the steps!
ReplyDeleteGreat colour combo. Love your blooms. Hugz
ReplyDelete