
[Note: This month and next, we have several STAMPlorations girls guest designing and joining the regular Spotlight Project girls and sharing more awesome step-by-step projects that feature our 5x7 stamp club sets. We hope you get even more inspired!]

Hi fellow STAMPlorations friends, Karola here to share some projects I created using one of my favourite STAMPlorations stamp sets - Sweet Cravings. I'm trying to cut down on sugar for a while so I have replaced eating sugar with creating lovely sugary crafts instead!

Today I will show you how to create two cards and a tag from one colourful background. I created the background using Distress Oxides and the cling wrap technique. If you don't own any Distress Oxides, you can use other inks - any water-soluble ink should work. In addition, you will need cling wrap (a piece which is larger than the cardstock you want to use), some watercolour paper (I used half of an A4 sheet) and a water spritzer.

Smudge ink directly from the ink pads onto your cling wrap. Then spritz generously with water - you will need enough water on the cling wrap to allow the inks to move around and smudge later. I like to add Perfect Pearls to the water as they give the finished background a lovely shine but that's optional.

Next, place your watercolour paper onto the inked cling wrap, and then flip it over so that you have the wrap on top. Use your fingers to move the ink around on the watercolour paper and smudge it to create your desired colour. Scrunch up the cling wrap to create ridges. This will give the background that lovely illusion of texture. If you don't use enough water it will be hard to move the cling wrap on the paper. Leave the card to air dry with the cling wrap on top (don't use a heat gun). Don't worry, there is plenty of other stuff to do while the background dries. Or you could take a break to enjoy some ice cream.

Stamp ice creams onto watercolour paper using a waterproof black ink. I used Gansai Tambi watercolours and a water brush to colour them, but you could use your preferred media. When the colour has dried, fussy cut the little delicacies and use a black marker to colour around the edges to give your pieces a finished look, or you could use the matching dies for this stamp set.

When the background has dried, use the two largest CUTplorations Crazy Double Running Stitched Rectangle dies to cut panels for two cards. The left side turned out bright and pretty whereas the colours on the right side looked a bit muddier so I thought it would work better for a design where most of it would be covered with another panel. Therefore I could cut out a tag using CUTplorations Luggage Tags Nesting Die - great tip for making your backgrounds go a bit further!
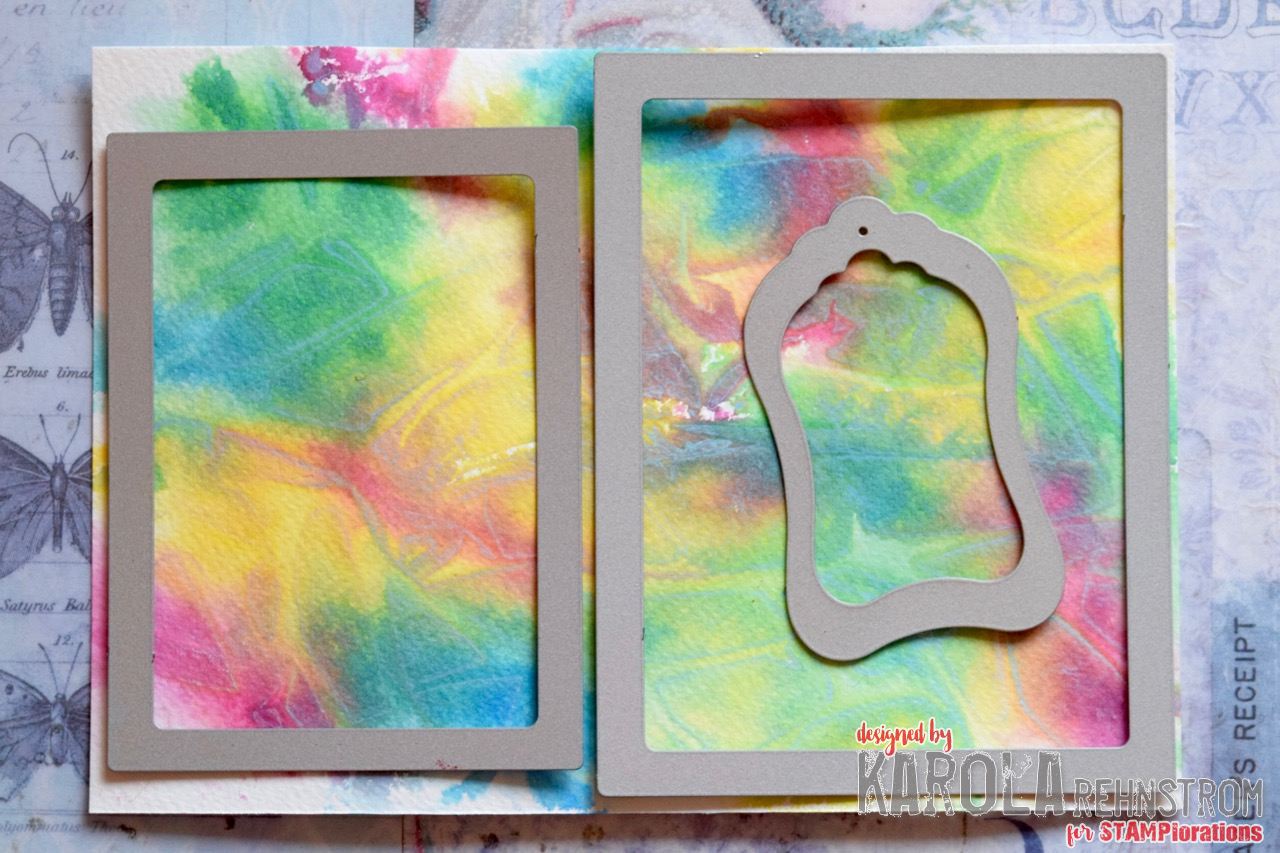
These are the pieces I ended up with so far.

I stamped the Popsicle sentiment in Versamark on the tag and then heat embossed in white.

To create the front panel for my second card, I die cut another piece of watercolour paper using the middle size CUTplorations Crazy Double Running Stitched Rectangle die, and used Washi tape to mask the edges of the panel. I then stamped the ice creams across the panel and coloured with watercolours, leaving the panel to dry.

To finish my cards, I stamped the sentiments for my cards onto black card in Versamark and heat embossed in white. I assembled the layers and attached them to white card bases. My only problem is that creating these cards didn't really make my sugar craving go away, now I'm really craving ice cream!

These are the STAMPlorations products I used for my projects:


STAMPlorations discount code: If you want to save 20% when shopping at the STAMPlorations store you can use the code STAMPGIRLKAROLA at checkout. The discount applies to all normal priced and discounted stamps, stencils and dies. The code cannot be combined with other discount codes.
I love the background technique - a lovely card
ReplyDeleteFabulous designs and colours...love your projects!
ReplyDeleteSimply awesome Karola and sooooooo detailed. Yummy ice cream and yummy colours. Lucky it is still ice cream weather in Australia.
ReplyDeleteThank you for the clear instructions, especially for the background. A wonderful project!
ReplyDeleteBlessings
Maxine
Love the colors! Great cards!
ReplyDeleteso wonderful!
ReplyDeletebeautiful work - love those colors!
ReplyDelete