


Hi STAMP peeps! Well Autumn is certainly in the air in my neck of the woods, but I couldn't resist giving the latest Stamp Club set a touch of rainbow colors. Wanna see?

At first glance you might think I did some ink blending. But I didn't. Let's see how I made this card.

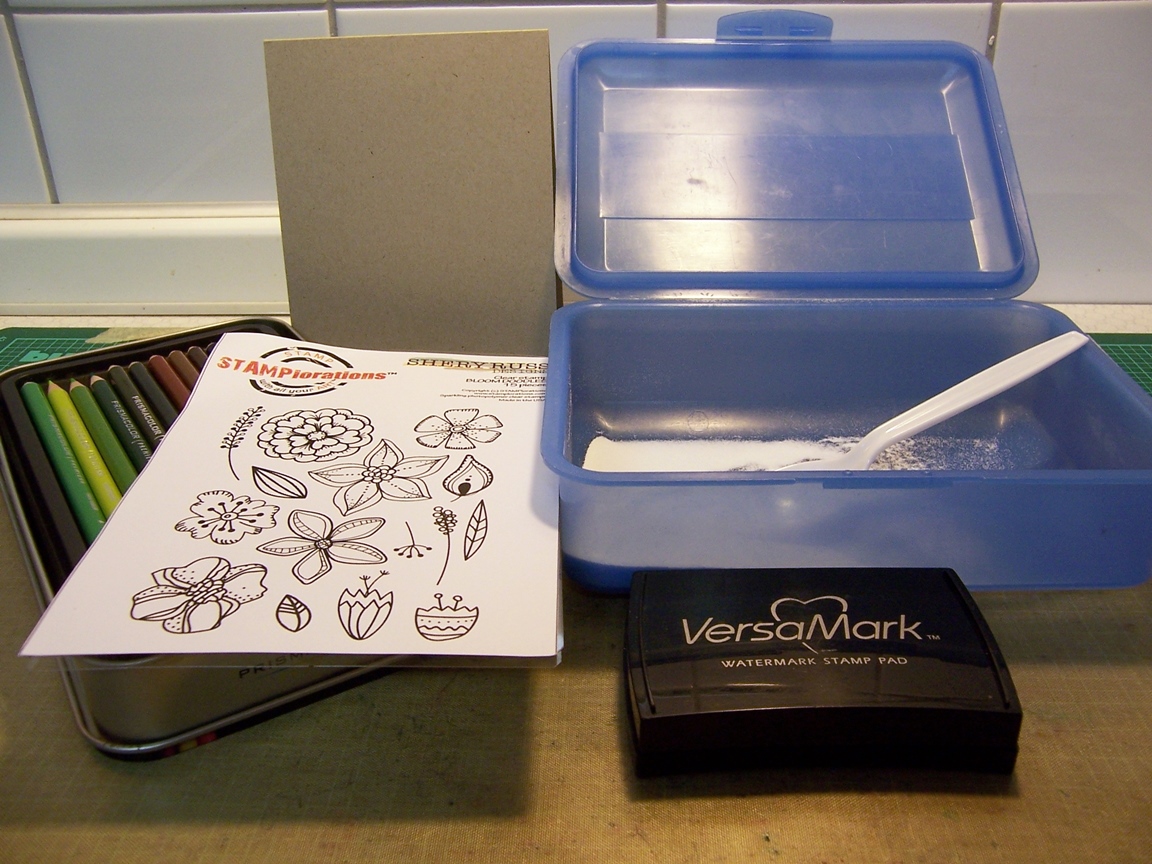
STEP 1
Gathered my supplies - Bloom Doodles stamp set, a kraft cardbase, Prismacolor colored pencils and white embossing powder. That's how I made this card! Just another variation on "Prismacolor pencils on dark cardstock."
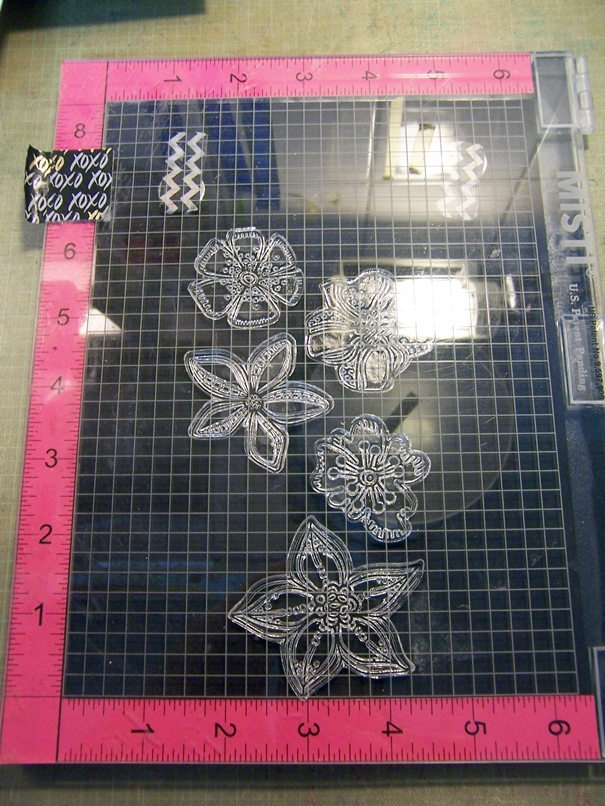
STEP 2
Arrange and stamp the flowers. I must admit, a stamp positioning tool is very helpful for this project. Stamp the flowers in white pigment ink. Let them dry. Be sure to leave your stamps on the stamp positioner cuz when you're done coloring the images you'll stamp again with Versamark and heat emboss them. This is a great tip I learned from Yana S.


STEP 3
Select your ROYGBIV colors to create the rainbow effect.

STEP 4
Now the fun begins. With a light hand (holding the pencil nearly parallel to the paper) lay down your first layer of color. In the second photo you can see my first layer of violet on all the flowers.


STEP 5
Continue putting down the first light layer of color. The stamped lines are there as a guide but you can color right over them. The first photo shows the warm tones. In the second the blue and green have been added too.


STEP 6
Put on some music. Get a drink. And color. Keep adding layers. Then add more layers. At some point (probably a good half hour later) the paper really won't accept any more pigment. That's how you know you're done ;) See the top flower? It still has only the first layer of color. The others have five or six and are finished.

STEP 7
This is the fun part. This step creates the wow factor. Place the card back into the stamp positioner which still has the stamps on it and stamp with Versamark and heat emboss white.


STEP 8
See? Compare this photo to the one in Step 6. See the wow factor? Those heat embossed lines look amazingly crisp. And they didn't get in your way when coloring!

I decided to add some heat embossed leaves to my design too. Then I added a sentiment strip and voila! A card with an autumn feel, but rainbow fun too! Because rainbows are always a good idea, right?

Hope you enjoyed my tutorial today. Should you try out any of the techniques from our Spotlight posts, like rainbow coloring on kraft card, be sure to hook up at our Spotlight Project Showcase.
Should you find yourself placing an order soon, I'd love it if you used my STAMPGIRLMARIA code for an additional 20% off!


I love your bright and bold
ReplyDeleterainbow flowers on the kraft
card stock. Thanks for the tip
about leaving the stamps on the
Misti :-)
Oh wow - this is on fantastic tutorial - I will have to remember this - writing it down - those flowers look amazing!! TFS Nice work
ReplyDeleteWow..Maria, I Love your pencil colored flowers in your rainbow colors and your fabulous tip to add versamark and heat emboss as your final step! Love the Wow factor. A Fall beauty. TFS Hugs.Nancy
ReplyDeleteI've used that Yana trick too, Maria, and it works so well to add a final touch. Beautiful colors on the flowers.
ReplyDeleteawesome card and great technique for achieving the 'WOW' factor - must give it a try:)
ReplyDeleteGorgeous!
ReplyDeleteEye-catching and beautifully colored! x
ReplyDeleteI love it!!! Great job. I may steal my son's Prisma pencils. :) He was my artist... got the full set of those. Way more than I do... and he's at college... he won't notice if they're missing.. right? :)
ReplyDeleteThis comment has been removed by the author.
ReplyDeleteThanks for the tutorial - embossing the lines last gives a stunning effect!!
ReplyDeleteBlessings
Maxine
Such a wonderful technique. Thank you for the step by steps and such a Wow factor in the end....Fabulous x
ReplyDeleteSuch a great card! Thanks for this technique!
ReplyDeletewow Maria this is simply stunning, love the rainbow of colours and the white embossing after. I have to try this, so love it.
ReplyDeleteThis is so very beautiful card!
ReplyDeletehugs